Share
Results 1 to 18 of 18

Thread: Harley tranny crack/weld, rebuild, project #2

  1. #1
    Join Date
    Feb 2011
    Location
    Fridley, Minnesota
    Posts
    376

    Default Harley tranny crack/weld, rebuild, project #2

    Hooda's Project #2

    So, this started out as a run of the mill build on a '76 vintage Harley 4 speed tranny. That was until I forgot the assembly sequence, one that I had done dozens of times over the years, but not for the last 6 years or so. In my infinite wisdom, I got it stuck in my head that an extra washer just HAD to fit into the countershaft assembly, in spite of the fact that it was proving to be a mechanical impossibility. Rather than wait and go toone of the shops I go to for parts and ask, I decided that the case must have gotten "bent", so I set up some wood blocks, got out the 5 pound lead hammer, and proceeded to "straighten it". The case survived 5 solid blows until it not only didn't straighten, but instead cracked neatly down the side.


    The crack starts on top to the left of the small hole, and snakes it's way down and to the right. Here's a top view


    And an inside view


    Next post will show the welds, but it's lites out for now..
    Last edited by hooda; 10-22-2011 at 02:24 PM. Reason: Tried to gey my mane on subject line.
    "It's not magic it's experimental, kind of like washing your hands after pooping used to be." -House

    Everlast PowerTig 250EX-arrived 1-26-2012
    Everlast PowerCool W300-arrived 1-26-2012
    Everlast PowerTig 185 Micro-arrived 1-26-2012
    Everlast PowerPlasma 70-arrived 1-26-2012
    ESAB MigMaster 250-borrowed
    HyperTherm 151 AKA "The Light Sabre"
    Linde UCC-305-964 lb. of old time water cooled TIG love-SOLD-Bad MOJO
    Purox OXY/ACETYLENE

  2. #2
    Join Date
    Feb 2011
    Location
    Fridley, Minnesota
    Posts
    376

    Default the cause

    As mentioned above, I was trying to fit a countershaft assembly shown here


    into the case. Here, I'm measuring the length of the assembly. Tha mistake came by the face that there's loose needle bearings in either end, with counterbores of differing depths, and 3 different thrust washers that go into the ends. 2 of the same in one end, one of those and one of varying thicknesses on the other end. I was going under the assumption thet a fourth washer of the first type went on before the variable thickness washer, and trying to "adjust the case accordingly", even with a factory service manual vaguely telling me different. My mistake, which I didn't figure out til the damage was done. I guess that I post these type of mistakes (on an HD forum, too), hoping to educate my peers, rather than have them do the same.
    Here's where the variable thickness washer rides. Reason for the variable thickness is to set endplay. The basic design of this tranny dates back to 1936, essentially UNCHANGED until 1978-1/2, when the switch from loose needle bearings to inferior torrington-style bearings was made.


    Below is a pic of the washer in question.

    "It's not magic it's experimental, kind of like washing your hands after pooping used to be." -House

    Everlast PowerTig 250EX-arrived 1-26-2012
    Everlast PowerCool W300-arrived 1-26-2012
    Everlast PowerTig 185 Micro-arrived 1-26-2012
    Everlast PowerPlasma 70-arrived 1-26-2012
    ESAB MigMaster 250-borrowed
    HyperTherm 151 AKA "The Light Sabre"
    Linde UCC-305-964 lb. of old time water cooled TIG love-SOLD-Bad MOJO
    Purox OXY/ACETYLENE

  3. #3
    Join Date
    Oct 2010
    Location
    Northern Virginia
    Posts
    1,323

    Default

    I have the OEM shop manual for my car and have been staring at it for 15 years- it's very badly written, so I know what you mean about vague manuals. I notice the crack runs through a threaded bolt hole- do you run the danger of weld heat warping the metal slightly, and skewing those threads or any gasket mating surfaces?
    DaveO
    Oxweld oxy acet gear
    IMIG 200
    PowerTIG 210 EXT... Amazing!

  4. #4
    Join Date
    Feb 2011
    Location
    Fridley, Minnesota
    Posts
    376

    Default The weld/repair

    Here's some pics of the actual weld, and the finish work I had to do to get this thing ready for assembly.


    Out of time. I will post pics of the completed tranny as soon as I can find them!


    "It's not magic it's experimental, kind of like washing your hands after pooping used to be." -House

    Everlast PowerTig 250EX-arrived 1-26-2012
    Everlast PowerCool W300-arrived 1-26-2012
    Everlast PowerTig 185 Micro-arrived 1-26-2012
    Everlast PowerPlasma 70-arrived 1-26-2012
    ESAB MigMaster 250-borrowed
    HyperTherm 151 AKA "The Light Sabre"
    Linde UCC-305-964 lb. of old time water cooled TIG love-SOLD-Bad MOJO
    Purox OXY/ACETYLENE

  5. #5
    Join Date
    Feb 2011
    Location
    Fridley, Minnesota
    Posts
    376

    Default

    Quote Originally Posted by DaveO View Post
    I have the OEM shop manual for my car and have been staring at it for 15 years- it's very badly written, so I know what you mean about vague manuals. I notice the crack runs through a threaded bolt hole- do you run the danger of weld heat warping the metal slightly, and skewing those threads or any gasket mating surfaces?


    Funny you should ask. I had to re-drill and tap 2 holes. Fortunately, they were non-critical, both in location, and function. LOTS of hand-filing to work around press-fit studs and screw-ins that may as well have been press fit. Due to the wide-open nature of this tranny, I was able to successfully get everything straight/true/flat enough for it to go back together with no issues whatsoever. Had this been a more modern 5, 6, or 7 speed (yes, there is actually a freaking 7 speed available nowadays!) I have doubts as to whether this type of repair would have been possible to do this way. Possible yes, but it would have required much more precision, more disassembly, and a bridgeport mill to get things beck in line.
    "It's not magic it's experimental, kind of like washing your hands after pooping used to be." -House

    Everlast PowerTig 250EX-arrived 1-26-2012
    Everlast PowerCool W300-arrived 1-26-2012
    Everlast PowerTig 185 Micro-arrived 1-26-2012
    Everlast PowerPlasma 70-arrived 1-26-2012
    ESAB MigMaster 250-borrowed
    HyperTherm 151 AKA "The Light Sabre"
    Linde UCC-305-964 lb. of old time water cooled TIG love-SOLD-Bad MOJO
    Purox OXY/ACETYLENE

  6. #6

    Default

    Memory is the first thing to go, mine left and I am still looking for it. What was I saying? Looks like a whole lot of work to repair, nice job though. My concern would be that looks like high stress area with the gears pushing against each other. I would not dump clutch it could be ugly.

  7. #7
    Join Date
    Sep 2011
    Location
    Middleburg Florida
    Posts
    556

    Default

    Did you do anything special to prep before welding? I've got my 59 ironhead sitting in crates till I get geared up to repair the cases (also waiting till I have a mill in the shop...) but old, grease soaked castings give me a bit of pause.
    Trip Bauer
    Former USN HT
    Everlast 200DX New Model
    Hobart Handler 125 MIG
    Van Norman #12
    Atlas 12" engine lathe
    '98 RoadKing - 84 Ironhead - 59 Ironhead

  8. #8

    Default

    Did you just throw a weld on the surface of the case? If so, I'm not so sure that is going to survive the vibration of a Shovelhead :-)
    Everlast 200DX
    Everlast PT185
    Shoptask 3-in-1 (not currently in my garage, but I own it...)

    Any day on a motorcycle like this that ends just needing parts and labor is a good day.
    4.82, 158.67mph 1/8th mile 7.350, 200.35mph 1/4 mile

  9. #9

    Default

    man that was one nasty crack. like sportbike said, i hope it holds up. how much more time did you spend fixing the "bent" casae?
    Journeyman welder
    250EX
    Power plasma 60
    horizontal band saw
    Miller digital elite 'wicked' lid

  10. #10
    Join Date
    Feb 2011
    Location
    Fridley, Minnesota
    Posts
    376

    Default

    Quote Originally Posted by Trip59 View Post
    Did you do anything special to prep before welding? I've got my 59 ironhead sitting in crates till I get geared up to repair the cases (also waiting till I have a mill in the shop...) but old, grease soaked castings give me a bit of pause.
    I was fortunate enough to have this happen while the cases were clean enough to eat off of, when I reassemble a rebuilt part, it's surgically clean, but to be safe, I cleaned everything with chlorinated brake cleaner, followed by acetone, followed by hot, soapy, then hot clear water. (remember the phosgene warning). I was limited by accesibility to form any deep vee's or anything, so I made sure to have enough amps to get good penetration.
    "It's not magic it's experimental, kind of like washing your hands after pooping used to be." -House

    Everlast PowerTig 250EX-arrived 1-26-2012
    Everlast PowerCool W300-arrived 1-26-2012
    Everlast PowerTig 185 Micro-arrived 1-26-2012
    Everlast PowerPlasma 70-arrived 1-26-2012
    ESAB MigMaster 250-borrowed
    HyperTherm 151 AKA "The Light Sabre"
    Linde UCC-305-964 lb. of old time water cooled TIG love-SOLD-Bad MOJO
    Purox OXY/ACETYLENE

  11. #11
    Join Date
    Feb 2011
    Location
    Fridley, Minnesota
    Posts
    376

    Default

    Quote Originally Posted by jerky View Post
    man that was one nasty crack. like sportbike said, i hope it holds up. how much more time did you spend fixing the "bent" casae?
    My STUPIDITY, all said and told, cost me a total of about 7-8 hours, if you count the time spent inventing new swear-words to express my frustration with
    "It's not magic it's experimental, kind of like washing your hands after pooping used to be." -House

    Everlast PowerTig 250EX-arrived 1-26-2012
    Everlast PowerCool W300-arrived 1-26-2012
    Everlast PowerTig 185 Micro-arrived 1-26-2012
    Everlast PowerPlasma 70-arrived 1-26-2012
    ESAB MigMaster 250-borrowed
    HyperTherm 151 AKA "The Light Sabre"
    Linde UCC-305-964 lb. of old time water cooled TIG love-SOLD-Bad MOJO
    Purox OXY/ACETYLENE

  12. #12
    Join Date
    Oct 2011
    Location
    Litchfield Park, AZ
    Posts
    370

    Default

    Quote Originally Posted by hooda View Post
    I was fortunate enough to have this happen while the cases were clean enough to eat off of, when I reassemble a rebuilt part, it's surgically clean, but to be safe, I cleaned everything with chlorinated brake cleaner, followed by acetone, followed by hot, soapy, then hot clear water. (remember the phosgene warning). I was limited by accesibility to form any deep vee's or anything, so I made sure to have enough amps to get good penetration.
    Deep penetration may not be enough if the crack was not ground out. If your weld is fused with the crack you have a crack already started. Crack tips have almost infinite stress concentrations as this is what helps cracks grow. The stored energy at the tip of a crack is released by the elongation of the crack when stresses are high enough to overcome the material properties. This is why drilling a hole at a crack tip helps stop the crack propagation because it allows the stresses to distribute more evenly and not allow the material to reach the point to allow a crack to grow further. I would keep a close eye on the repair. Would hate for you to be on a long drive and end up with no oil in your gear box.
    Miller 252
    PowerTig 250 EXT
    Evolution Rage 2
    48X6 inch Belt Sander w/ 9 inch Disk Sander
    ...

  13. #13

    Default

    Do you need to bake/pre-heat something like that before you weld?
    Lincoln Eagle Engine Drive
    Everlast MTS 250
    Everlast Power Tig 225lx
    HTP Mig 2400
    Everlast Power Plasma 60C --> Just need to finish my CNC Plasma Table!
    Miller Spectrum 375 Extreme Plasma cutter
    Victor cutting torch
    HF 20 Ton Shop Press
    HF 4x6 Band Saw
    HF Air Compressor
    Northern Tool Drill Press


    www.murphywelding.com

  14. #14
    Join Date
    Oct 2011
    Location
    Litchfield Park, AZ
    Posts
    370

    Default

    Quote Originally Posted by SeanMurphy265 View Post
    Do you need to bake/pre-heat something like that before you weld?
    Pre-heating will help relieve stresses in the weld and provide a better product. With some code welds base metal repairs deeper than an 1/8 of an inch require pre-heating due to residual stresses in the weld when it cools.
    Miller 252
    PowerTig 250 EXT
    Evolution Rage 2
    48X6 inch Belt Sander w/ 9 inch Disk Sander
    ...

  15. #15
    Join Date
    Sep 2011
    Location
    Middleburg Florida
    Posts
    556

    Default

    Quote Originally Posted by hooda View Post
    I was fortunate enough to have this happen while the cases were clean enough to eat off of, when I reassemble a rebuilt part, it's surgically clean, but to be safe, I cleaned everything with chlorinated brake cleaner, followed by acetone, followed by hot, soapy, then hot clear water. (remember the phosgene warning). I was limited by accesibility to form any deep vee's or anything, so I made sure to have enough amps to get good penetration.
    I've been thinking about cooking some parts in a crockpot in a degreaser, though I haven't found a good one to use (no, I'm not cooking alcohol, don't care what the old timers did)

    One of the things that scares me about repairing my cases are all the cracks and the roots. Going to wind up with a ton of weld, I'm worried about warpage control.
    Trip Bauer
    Former USN HT
    Everlast 200DX New Model
    Hobart Handler 125 MIG
    Van Norman #12
    Atlas 12" engine lathe
    '98 RoadKing - 84 Ironhead - 59 Ironhead

  16. #16
    Join Date
    Feb 2011
    Location
    Fridley, Minnesota
    Posts
    376

    Default

    Quote Originally Posted by Trip59 View Post
    I've been thinking about cooking some parts in a crockpot in a degreaser, though I haven't found a good one to use (no, I'm not cooking alcohol, don't care what the old timers did)

    One of the things that scares me about repairing my cases are all the cracks and the roots. Going to wind up with a ton of weld, I'm worried about warpage control.
    In the case of old HD repair, It's best to take the expert advice such as some that's been given in this thread and toss it out the window. With these dinosaur-ish castings, you have to acquire a "feel" for whether your repair is going to be good, or not. There's basically someone here telling me blah blah this and that, but I've made several of these type of repairs, all without the dreaded stress cracks, all without pre-heating, and so far, all still oil-tight and running fine. I got US $20.00 that says that this case is still intact and oil tight 5 years from now, and on a running, 85 horsepower/85 ft.lb. bike. That's how confident I am of the repair. If you need help coming up with a strategy to weld up your sportster cases, keep in mind that they are a completely different animal, and I'm willing to give you assistance in setting up a plan for cleaning, pre-heat, and the proper welding of your cases. Just let me know
    "It's not magic it's experimental, kind of like washing your hands after pooping used to be." -House

    Everlast PowerTig 250EX-arrived 1-26-2012
    Everlast PowerCool W300-arrived 1-26-2012
    Everlast PowerTig 185 Micro-arrived 1-26-2012
    Everlast PowerPlasma 70-arrived 1-26-2012
    ESAB MigMaster 250-borrowed
    HyperTherm 151 AKA "The Light Sabre"
    Linde UCC-305-964 lb. of old time water cooled TIG love-SOLD-Bad MOJO
    Purox OXY/ACETYLENE

  17. #17
    Join Date
    Sep 2011
    Location
    Middleburg Florida
    Posts
    556

    Default

    Appreciate it! It'll be a while before I think about it, lots of other projects, need to acquire a mill, need to put at least 100 hours through the TIG machine I haven't even gotten yet before I'd think about taking torch to a set of 59 cases...

    Of course, time comes, I might take them to a local shop and just have them vatted...

    Just an idea of the extensive repairs, the ear for the gennie snapped a while back (before I had it) and was welded back together not quite right, the bushing for the idler wasn't machined right and it came loose and wore out the boss. The left side, 3/4 of the primary bolt holes are cracked on the inside and need to be welded, re-drilled and tapped. There are a few stress cracks in the web and one ear of the tranny door is broken. That's what I can recall, it's been two years since I crated it for long term storage.

    Folks say scrap em and buy aftermarket or ebay, but hell, they're 1959 sporty cases, they're the soul of the bike
    Trip Bauer
    Former USN HT
    Everlast 200DX New Model
    Hobart Handler 125 MIG
    Van Norman #12
    Atlas 12" engine lathe
    '98 RoadKing - 84 Ironhead - 59 Ironhead

  18. #18
    Join Date
    Feb 2011
    Location
    Fridley, Minnesota
    Posts
    376

    Default

    Quote Originally Posted by Trip59 View Post
    Appreciate it!
    Of course, time comes, I might take them to a local shop and just have them vatted...

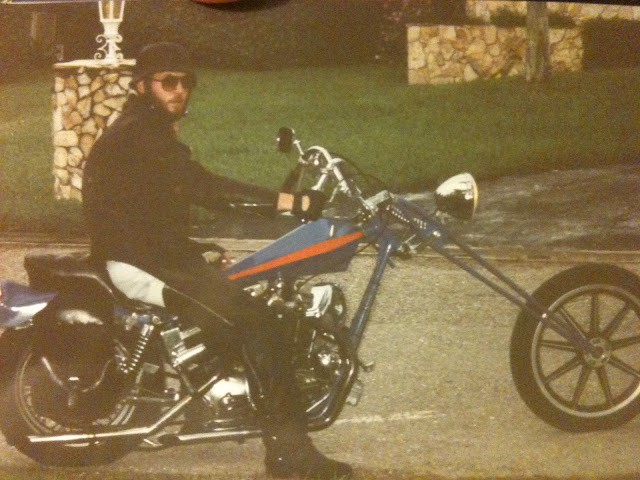
    Folks say scrap em and buy aftermarket or ebay, but hell, they're 1959 sporty cases, they're the soul of the bike
    GREAT PHOTO!! You are correct about the cases being the soul of the bike, especially if your state is like MN where the title on pre-1970 bikes attaches to the ENGINE serial number, not the frame. I've seen cases that have literally feet of weld, and were at one time broken into 5 or more pieces that have been beautifully repaired, done by crusty, old school guys using crusty, old school equipment. A lot of whether a repair of this nature is success or failure has to do with the time the person doing it is willing to spend, and the PATIENCE necessary to get it right. The repair I did on this tranny was in an area that LOOKS like a high stress area, but it's not as bad as it looks. Now, I can't wait to get into a new, modern EVERLAST machine, as I strongly believe that if I can do these repairs with the dinosaur equipment I've been stuck using so far, having the capabilities to adjust balance, frequency, and actually having a pulse feature will enable me to do things not previously possible (for me at least). Can't wait!!
    "It's not magic it's experimental, kind of like washing your hands after pooping used to be." -House

    Everlast PowerTig 250EX-arrived 1-26-2012
    Everlast PowerCool W300-arrived 1-26-2012
    Everlast PowerTig 185 Micro-arrived 1-26-2012
    Everlast PowerPlasma 70-arrived 1-26-2012
    ESAB MigMaster 250-borrowed
    HyperTherm 151 AKA "The Light Sabre"
    Linde UCC-305-964 lb. of old time water cooled TIG love-SOLD-Bad MOJO
    Purox OXY/ACETYLENE

Similar Threads

  1. Project 1 From Hooda Tranny case repair (FOR 1st 2013)
    By hooda in forum On Road Fabrication
    Replies: 19
    Last Post: 01-22-2013, 07:23 AM
  2. Regulator rebuild
    By DaveO in forum Personal Projects (no welder required)
    Replies: 0
    Last Post: 01-02-2013, 01:11 AM
  3. Carburetor rebuild project.
    By Brian Ski in forum Personal Projects (no welder required)
    Replies: 9
    Last Post: 03-25-2012, 02:52 PM
  4. Project# 1 Weld Table
    By brianscott in forum Other Custom Fabrications
    Replies: 5
    Last Post: 01-19-2012, 03:53 PM
  5. One-off Harley fender project #1
    By hooda in forum On Road Fabrication
    Replies: 17
    Last Post: 10-10-2011, 09:39 PM

Posting Permissions

  • You may not post new threads
  • You may not post replies
  • You may not post attachments
  • You may not edit your posts
  •