Share
Page 1 of 2 12 LastLast
Results 1 to 20 of 22

Thread: Tig welding custom cut bend pipes

  1. Default Tig welding custom cut bend pipes

    My last post was horrible I think everything went wrong on my welds plus its been almost a year since I welded anything 0_0. I had bad fitment, no back purging and everythning. I got great advice from guys on the forum changed a bunch of stuff worked harder to get the right end results and this is what I got. (Took forever because engineering school is something else)

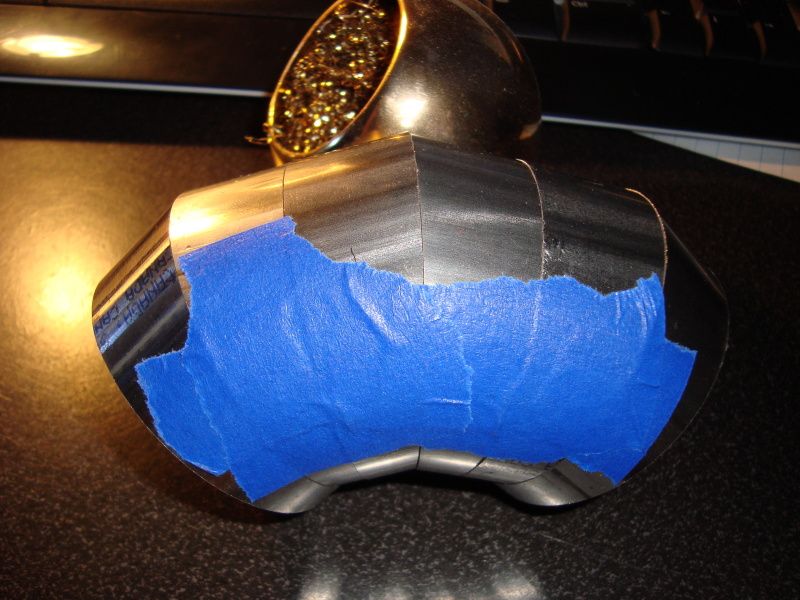
    Fitment was KING in this welding. I cut them clean on a band saw and then sanded the heck out of them. The pipes were so close I didn't even use filler ....... Well my learning curve hasn't got to where I can use filler rod effectively. I having trouble finding it comfortable to move and add at the same time. Probably need more adjustments on my welding table or position.

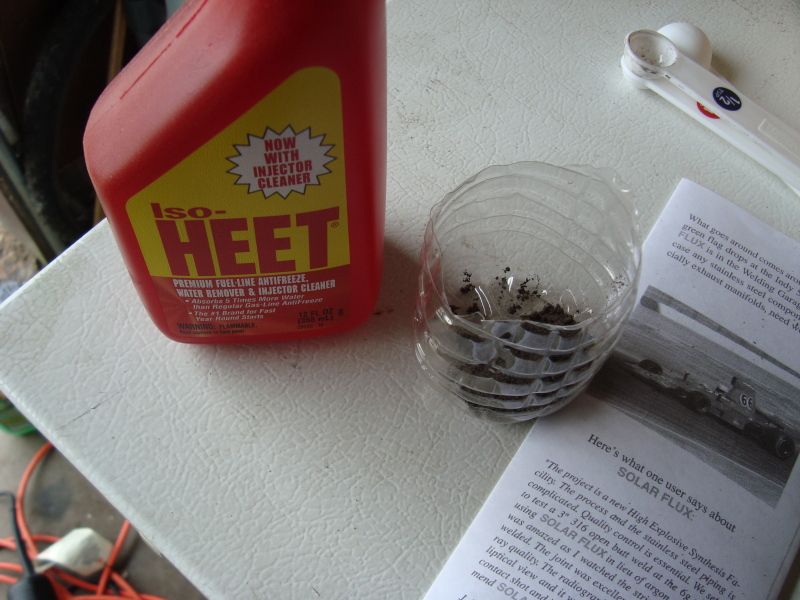
    I listened to guys on the forum and used Solar Fulx type B. I got it on ebay because I wanted a small amount to test and it is BA!!! Sure beats using back purge because the pipes I weld are so small not sure how I would back purge effectively?

    Everything else was the same got good heat from 55 amps DC no pulsing or fancy stuff. Well didn't use it because I not sure what to set it to yet.

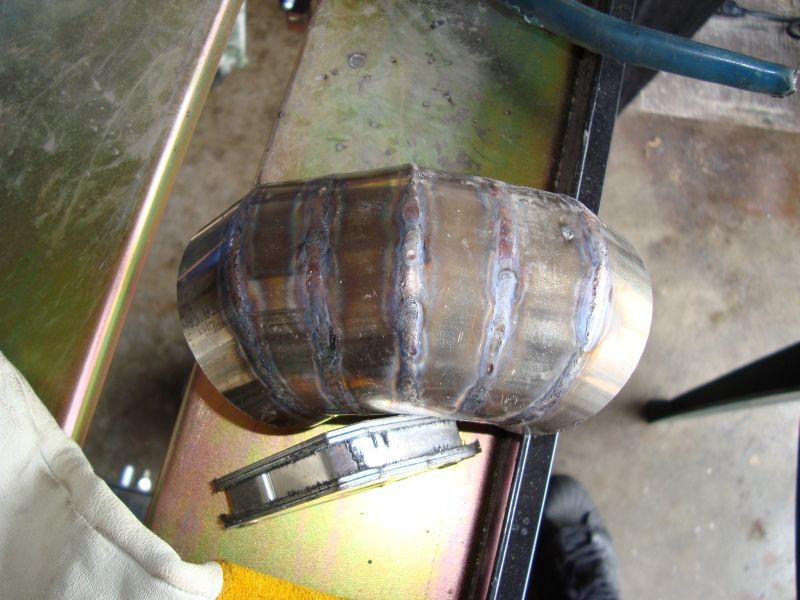
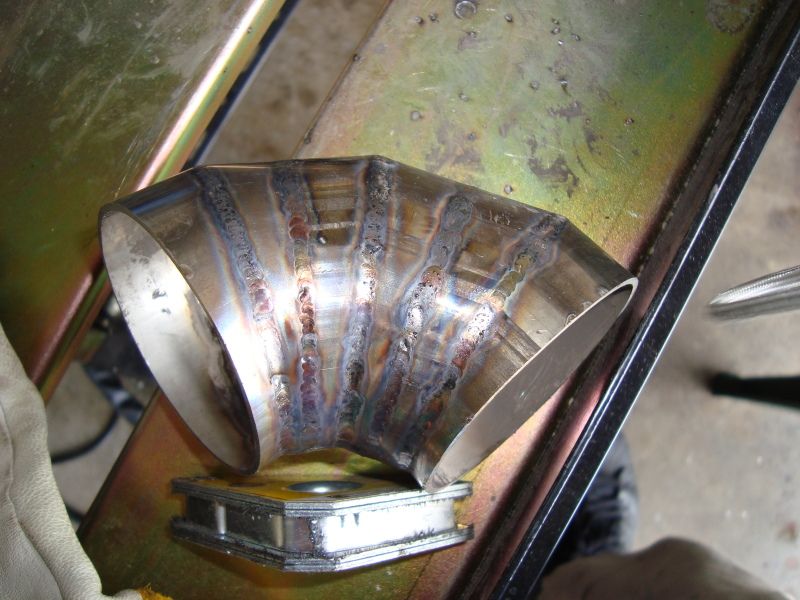
    Oh my welds got some burned dirty stuff because I got supper excited and got started with out grease removal on the pipes. The grease came from lubricating the band saw to cut it. Oh well one more thing to remember when I get good cuts again.

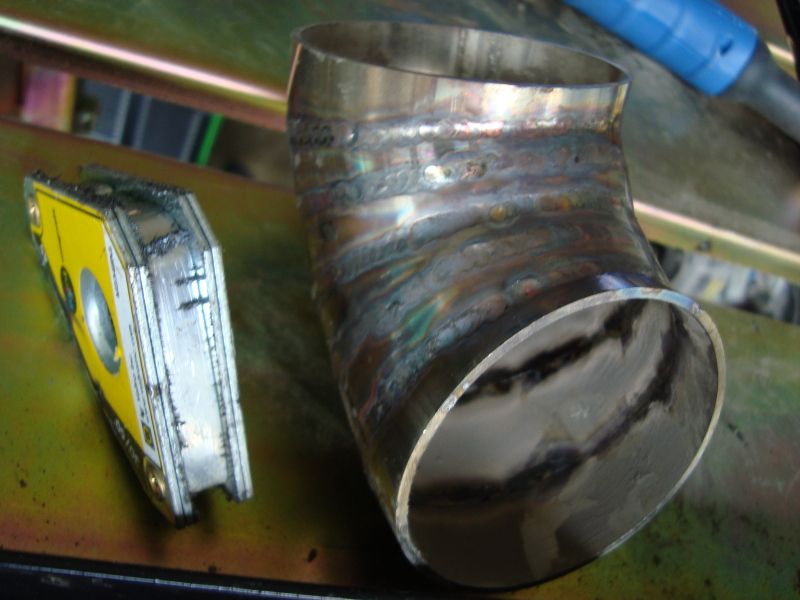
    Materiel is 0.65 straight pipe 2.5 inches diameter. Cut on one side 15 degree angle and other is a straight cut. I added them together to make a 90 but the gradation of the bending is not sufficient for me. I want more gradation so I will change the angle to get more bending out of it.

    So far its not bad as I welded I figured some stuff out and it got better progressively. Please no bashing me this is only the second pipe I attempted to weld and happy I even was able to get this far !!!! I am going to try harder next time and do better so all my welding looks better. Good welding all my forum people !!!!!


  2. #2

    Default

    What's this piece used for ?
    2013 250EX : SSC Pedal : I-MIG 250P 20' Profax gun : Power Plasma 60 p80 torch : 3M Speedglas 9100XX : Evolution Rage 3 DB cold saw

  3. Default

    Quote Originally Posted by zoama585 View Post
    What's this piece used for ?
    Trying to make a down pipe for a homemade turbo set up. Also going to attempt to make a full exhaust. This was really a preliminary test if I could even do anything with this machine ( my second time trying to tig weld ). Trying to save some money by not having to buy mandrel bends since one 180 degree pipe can be like 50+ depending on diameter. I just cut them and bend them myself out of one pipe. Not to terribly concerned with smooth flow since that will increase the cost of this project exponentially. I know it is not the best way to do it nor the easiest way but I am going to try !

  4. #4

    Default

    Just in case you need some of this stuff... http://www.summitracing.com/search/P...+bends+2+1%2f2

    Cutting this one in half would yield two tight radius downpipes for $23 http://www.summitracing.com/parts/IMM-548660/
    Last edited by zoama; 02-04-2012 at 09:47 PM.
    2013 250EX : SSC Pedal : I-MIG 250P 20' Profax gun : Power Plasma 60 p80 torch : 3M Speedglas 9100XX : Evolution Rage 3 DB cold saw

  5. #5

    Default

    when your welding stainless you should always use filler. even if you dont need to. the reason being that when you weld stainless, you creat alot of heat in one area, and being stainless, it doesent move that heat very good. SO in your HAZ (heat affected zone) becasue you have such high heats, you can get carbide percipitaion. basically the worse thing to have on stainless. ADDING filler whilst you weld actually decreases the weld puddle temperature thus reducing the chance of CP.
    Journeyman welder
    250EX
    Power plasma 60
    horizontal band saw
    Miller digital elite 'wicked' lid

  6. #6

    Default

    Sorry if your looking for bashing you need to go to miller forum. EL members do not bash or be little other members just share there knowledge and try to help each other. I can tell you there is some smart and talanted people here and willing to help and help you be a better welder.
    Bill

  7. #7
    Join Date
    Oct 2010
    Location
    Northern Virginia
    Posts
    1,323

    Default

    LOL! Cuda, you beat me to it. Sorry, Vinhtec, we don't bash here, altho we can direct you to some other sites. Sure looks like you nailed the fit-up, and I'd say fairly impressive for your second time out of the gate. What kind of vehicle gets the turbo when it's done?
    DaveO
    Oxweld oxy acet gear
    IMIG 200
    PowerTIG 210 EXT... Amazing!

  8. #8

    Default

    Quote Originally Posted by DaveO View Post
    Sure looks like you nailed the fit-up, and I'd say fairly impressive for your second time out of the gate.
    Yeah, I'd say... Looks real good!
    Everlast PowerPlasma70
    Hobart Ironman 230
    Lincoln A-D/C 225
    'Classic' Everlast Powertig 200DX 'We don't need no steenkin pre-flow..'
    jakemateer.com

  9. #9

    Default

    Very nice job.
    I sure hope when I get my Tig that I can weld like that starting out.
    Any pics of what it is going into.
    Consistency is a good thing....unless you're consistently an idiot.

    Miller Matic 185
    Thermal Dynamics Pak Master 38xl
    Everlast 250EX

  10. Default

    Quote Originally Posted by zoama585 View Post
    Just in case you need some of this stuff... http://www.summitracing.com/search/P...+bends+2+1%2f2

    Cutting this one in half would yield two tight radius downpipes for $23 http://www.summitracing.com/parts/IMM-548660/
    Yeah but this was 304 stainless that's why it was expensive I know that the lower end metals like that are cheaper but not good for weather resistance and stuff. Thanks for that Ill save it just in case I ever decided to do any aluminumized steel pipes.

  11. Default

    Quote Originally Posted by jerky View Post
    when your welding stainless you should always use filler. even if you dont need to. the reason being that when you weld stainless, you creat alot of heat in one area, and being stainless, it doesent move that heat very good. SO in your HAZ (heat affected zone) becasue you have such high heats, you can get carbide percipitaion. basically the worse thing to have on stainless. ADDING filler whilst you weld actually decreases the weld puddle temperature thus reducing the chance of CP.
    Yeah thanks ! I read that feeding wire in helps the temperature stay down a lot when welding stainless. This time was mainly a practice attempt. I am still really slow and cant get good body position to move fluidly. I have a small spool of left over 308L stainless weld wire (or something) from a mig welder I am going to feed that stuff into the weld next time. I read somewhere that the silica in it or something helps keep it cooler. I just need tons more seat time to practice feeding wire and moving. Its also hard since the pipes a curved thing and not flat it makes it harder. Ill keep trying though.

  12. Default

    Quote Originally Posted by jerky View Post
    when your welding stainless you should always use filler. even if you dont need to. the reason being that when you weld stainless, you creat alot of heat in one area, and being stainless, it doesent move that heat very good. SO in your HAZ (heat affected zone) becasue you have such high heats, you can get carbide percipitaion. basically the worse thing to have on stainless. ADDING filler whilst you weld actually decreases the weld puddle temperature thus reducing the chance of CP.
    Yeah thanks ! I read that feeding wire in helps the temperature stay down a lot when welding stainless. This time was mainly a practice attempt. I am still really slow and cant get good body position to move fluidly. I have a small spool of left over 308L stainless weld wire (or something) from a mig welder I am going to feed that stuff into the weld next time. I read somewhere that the silica in it or something helps keep it cooler. I just need tons more seat time to practice feeding wire and moving. Its also hard since the pipes a curved thing and not flat it makes it harder. Ill keep trying though.

    I am not sure about Carbon Precipitation but I read this.

    http://www.azom.com/article.aspx?ArticleID=1177

    Yeah looks like elevated temperatures will allow the chromium to form carbides when the temperature is elevated. Ruining the corrosion resistance and making it brittle. This stuff makes sense since I have taking a material science class on grain boundry formation after elevated temperature and this makes perfect sense. When the grain boundaries reform the chromium and the carbon from carbides on the surface.

    Doesn't solar flux prevent this? I see much less black chunky stuff inside the pipe in comparison to when I welded with out it.

    Do you know what temperature the weld would be with out filler and with filler? Looks like the range is like 425 - 800 C with 700 C being a critical temperature. I guess Ill get a pyrometer to measure it with and with out filler. Ill have to test it I guess.

  13. Default

    Quote Originally Posted by 67cudafb View Post
    Sorry if your looking for bashing you need to go to miller forum. EL members do not bash or be little other members just share there knowledge and try to help each other. I can tell you there is some smart and talanted people here and willing to help and help you be a better welder.
    Thanks I wont go to the Miller forum ever. I been bashed before for no reason and I love to stay away from that. I hope that talented people show up on my threads and give more pointers I got this far with good old fashion advice taken serious!

  14. Default

    Quote Originally Posted by DaveO View Post
    LOL! Cuda, you beat me to it. Sorry, Vinhtec, we don't bash here, altho we can direct you to some other sites. Sure looks like you nailed the fit-up, and I'd say fairly impressive for your second time out of the gate. What kind of vehicle gets the turbo when it's done?
    I am a Honda guy. I have a little 95 civic sohc engine that I am doing a home made turbo to. I got bunch of free stuff from friends just trying to make it work. I plan on making it a daily driver and as long as I dont goose it too much the car should make decent power and gas mileage! Thanks I got good advice from some one here on fit-up and it worked out great ! I am trying hard to get it moving a long Id really like to make something that works soon that be amazing !!!

  15. Default

    Quote Originally Posted by Jake98 View Post
    Yeah, I'd say... Looks real good!
    Thanks a lot I hope to have better work to show ever one soon !

  16. Default

    Quote Originally Posted by brad3579 View Post
    Very nice job.
    I sure hope when I get my Tig that I can weld like that starting out.
    Any pics of what it is going into.
    Yeah you can just read as much as you can that is how I started. I think I read for like 3 years before I had the cash or knowledge to do anything. Then its just seat time. (I need tons more). Ill get some pictures together soon !

  17. #17

    Default

    Instead of making tons of posts in a row spaming, you can quote multiple in one post. Anyways good job on the custom cuts. How well did that tape hold them together while you tacked them?
    Jason
    Everlast 255EXT - Perfection
    Everlast PowerPro 256 - UPS Demolished
    Everlast MTS200s
    12 Ton Shop Press
    DeWalt Hand Tools/ChopSaw

  18. Default

    Quote Originally Posted by Jason View Post
    Instead of making tons of posts in a row spaming, you can quote multiple in one post. Anyways good job on the custom cuts. How well did that tape hold them together while you tacked them?
    Good idea that Ill do that next time !

    Thanks I made a little jig out of wood to hold the pipe while I cut it. The angle was approximate but it seams to hold close to 15 degrees.I sanded them pretty well and they matched up almost 100% flushed so the tape didn't bind them that tightly. It just held them there for a couple of tacks then I just tore it off.

  19. #19

    Default

    For a hoot, go make your posts on Weldingweb and especially mention that you used an Everlast machine. They will be so busy bashing you for your choice of machines, that they will never get around to breaking your balls about your welds. You could really start a shitstorm there with just one short post.
    Some of the crap I use to keep busy:

    Everlast 200DX
    Millermatic 211 Mig
    Hypertherm Powermax 30 plasma cutter
    Lincoln Weld-Pak 100
    Century Stick welder
    Oxy set-up with Henrob 2000 torch
    Logan 200 lathe (60 years old)
    Jet band saw
    About 6 Harbor Freight grinders with different discs/wheels/brushes

  20. #20
    Join Date
    Dec 2009
    Location
    Greater Seattle, WA
    Posts
    813

    Default

    Looks like a great project for learning to weld thin stainless tubing to me.

    The fit-up must have been very good if you welded all that autogenously. If you don't need maximum strength of a "built-up" weld bead, there is nothing wrong with autogenous welding, imo. Welding autogenously can allow dramatically increased travel speed and along with that, a reduction in heat input.

    It is challenging to maneuver around a tube. You will find with additional practice, you will be able to get around the tube with fewer "stops and starts". i.e., you'll be able to weld longer seams at a time, and pivoting your torch (filler rod if applicable), and point of view more each time.

    The solar flux when it gets up to temperature, melts and shields the stainless underneath, and then solidifies into that black glassy stuff you see on the inside of your tubing. Assuming you got the solar flux evenly applied everwhere on the back side of the weld, then if you see a spot on the inside of the tubing where the solar flux didn't get up to temperature (no black glassly stuff but you still see the grey powder of the unactivated flux), it means you didn't achieve enough heat to melt the metals and fully penetrate the weld bead through to the back side in that spot.
    '13 Everlast 255EXT
    '07 Everlast Super200P

Similar Threads

  1. Replies: 10
    Last Post: 02-19-2013, 02:26 PM
  2. Replies: 28
    Last Post: 12-10-2012, 01:21 AM
  3. Replies: 9
    Last Post: 09-28-2012, 10:28 PM
  4. Replies: 4
    Last Post: 07-18-2011, 03:10 AM
  5. Butt Welding Aluminum Pipes
    By drifterific in forum General Welder Questions
    Replies: 38
    Last Post: 04-03-2011, 03:20 AM

Posting Permissions

  • You may not post new threads
  • You may not post replies
  • You may not post attachments
  • You may not edit your posts
  •