Share
Page 2 of 3 FirstFirst 123 LastLast
Results 21 to 40 of 43

Thread: McClary here

  1. Default

    Quote Originally Posted by The Goat View Post
    McClary,

    Super cool, love the fender extension, wicked chop, leaning the pillars, 2" section, all of it, it'll be killer. ...and the price can't be beat for sure. That dog house looks like a tough nut to crack, but not impossible. It'll be one hot ride and really showcase your talents. Keep the pics coming as it progresses, really interesting stuff. Also, I know for a fact that you can get bags that will support the 460 and still keep ride quality, plus it would look WAY cool. I've done a few mix and match airbag set-ups and the people in the know (SEMA types) are really helpful when tackling this sort of build.

    I tried to do the IMG links from the site and they showed up just as the direct links, but not underlined and going nowhere if you know what I mean. I'll try again soon with some pics of my small modest shop and see what comes of it. Thanks for the advice, I'm sure it's really just a fat finger problem.

    Goat
    thanks Goat, if i ever get to the point i can start on this thing, ill post pics.. right now its just writing on paper what i will do .. hopefully not a pipedream. ive built so many rides for other people, maybe someday i can build mine.. haha...
    on the bags, yeah, im sure a good #2600 bag would hold it fine or even #2800's , but problem is , im gonna build arms similar to Mustang II , i have a Heidtis Mustang II front clip that im gonna do the mock up off of.. with that type of arms, i worry that only size bag i will be able to put under it will be the #2500 types.. im not sure yet... as i get closer to the build ill fig it out..
    ive done my share of air bagging rides for years, and figure it out, so whats 1 more to the list .. haha..

    oh , on the picture thing at Photobucket...
    heres a picture what im talking about...
    copy the code where the red circle i made ..

    then when your making a post , just copy it to the screen .. like this ..
    [IMG ]http://img.photobucket.com/albums/v333/doctor_iceman/test.jpg[/IMG ]
    i put a space on the IMG code so you can see the link..
    hope that helps ya out some...

    Quote Originally Posted by everlastsupport View Post
    That's not my Nova . I like that old rusted (blue) bucked under it.

    The glass in it might be worth quite a few bucks on ebay.

    No floor pans not a big deal (no floor). But the front end looks like a lot of work. It will not be stock when you are done.

    Do you use any of the rusted parts? What do you treat it with if you do?

    Amazing the dash is not that bad.
    haha, no Nova , i didnt get to go see it this weekend.. maybeeee next weekend.. im gonna take the camera and get a few snap shots... ..
    all the glass in the ford is flat... which is great, cause it shouldnt cost arm and a leg to get new cut glass for it.. i hope.. stock glass is little shot.. might see if i can sell it though..

    yeah, ill be making a new floor.... blue bucket will have to go!! haha

    eventhough it looks like a rust bucket... the outside panels are not bad.. looks bad, but mostly surface rust, due to the thicker and harder metal then what they use today..
    it depends on the panel what i do with the rust..
    this car, if i get a chance to work on it... ill prob just clean the areas im gonna be working on with a wire brush on a drill / grinder, and use some surface rust converter with steel wool to really clean it... just on the areas ill be working on , like the sections for the chop roof and etc... after i get few of the major things done, ill prob haul it off to get it chemical / acid dipped, which will clean the hole car inside and out... at least thats the game plan...


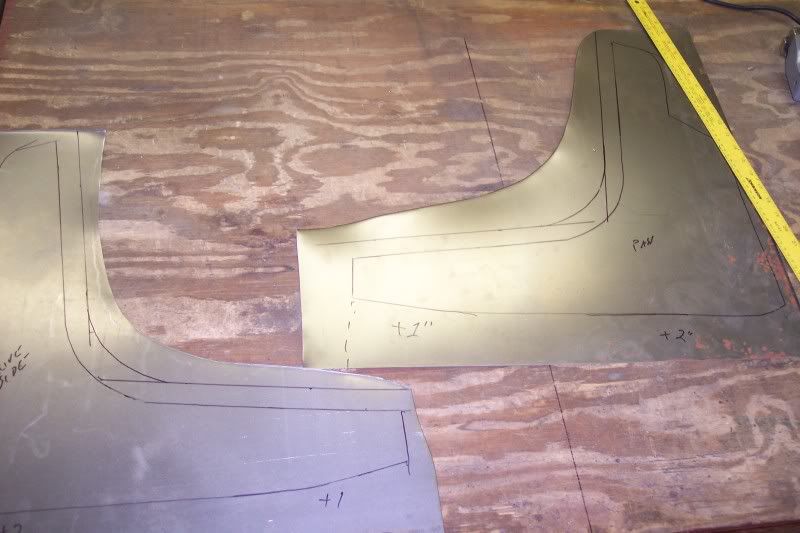
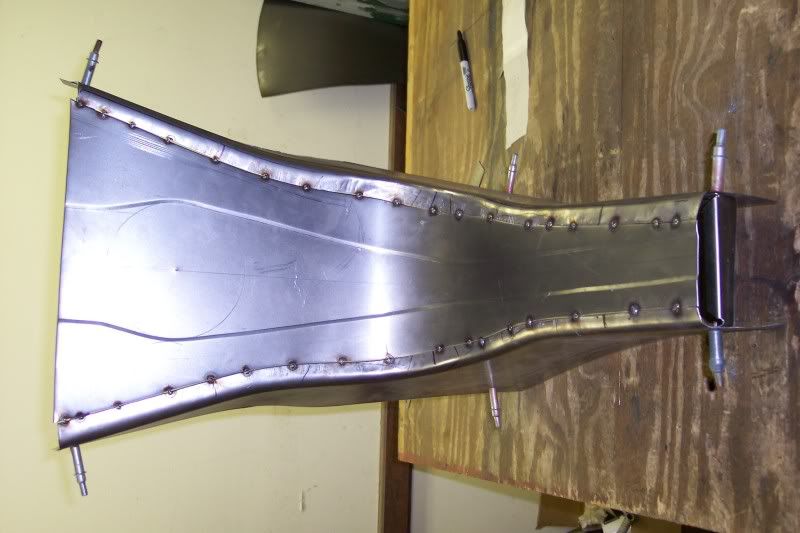
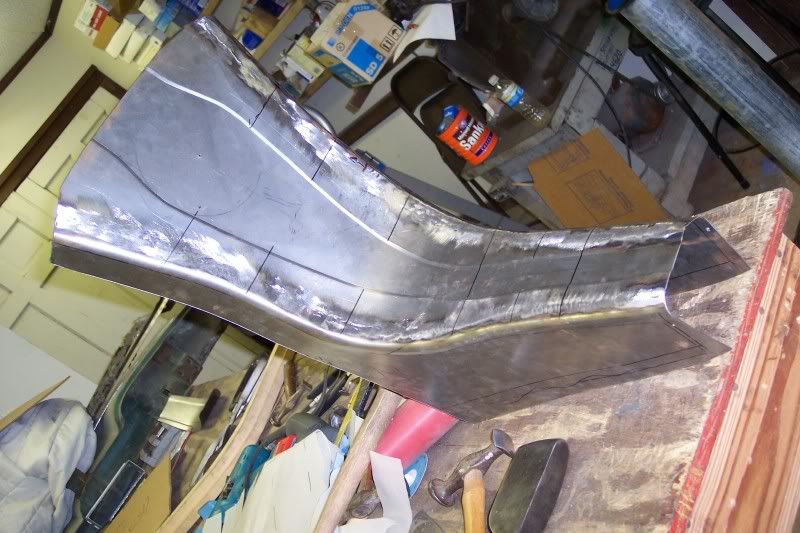
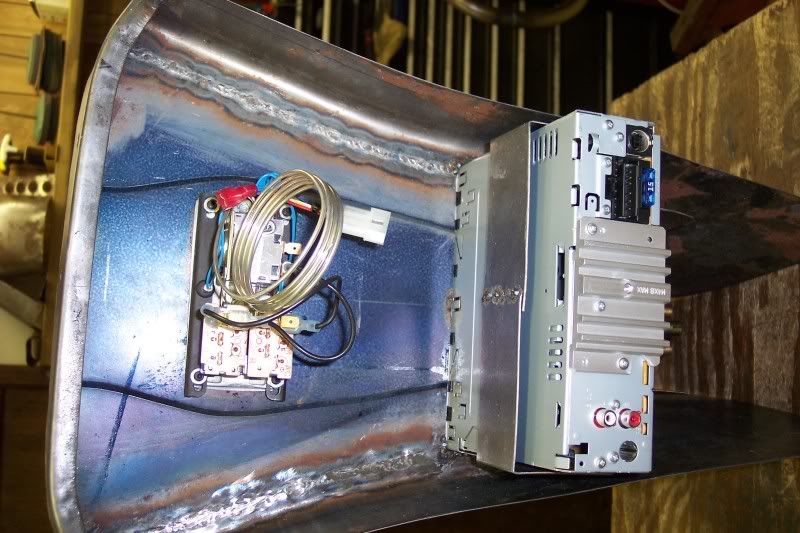
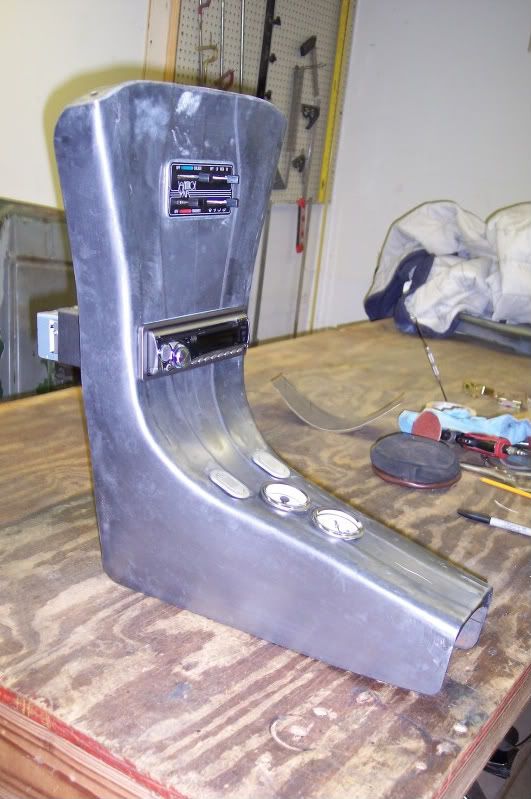
    heres a center console im working on for a 34 ford.... notice the indented bodyline in the middle that continuous off the dash...
    everything was tig welded and planish using 20gauge cr sheetmetal


  2. #22

    Default

    McClary,

    The console look great. nice work. Keep the pictures coming. You have me about ready to keep the vette. I have a buyer for it and just want it down right now. Cars are a lot of work. And this is only a 78, nothing like what you pulled from the woods.

    That console has motivated me a bit.
    Mike R.
    Email: admineverlast@everlastwelders.com
    www.everlastgenerators.com
    www.everlastwelders.com
    877-755-9353 x203
    M-F 12 - 7PM PST
    FYI: PP50, PP80, IMIG-200, IMIG-250P, 210EXT and 255EXT.

  3. #23
    Join Date
    Aug 2009
    Location
    Albuquerque, NM
    Posts
    22

    Default

    McClary,

    Nice metal manipulation on the console, someone's getting a real nice one-off.

    Thanks for the advice on the pics. It's possible that when I inserted that link the other day that I didn't preview it to see if the pics showed up, so I'll try it again soon.

    Goat

  4. Default

    no prob Goat...

    heres few other pics i have on the computer ...

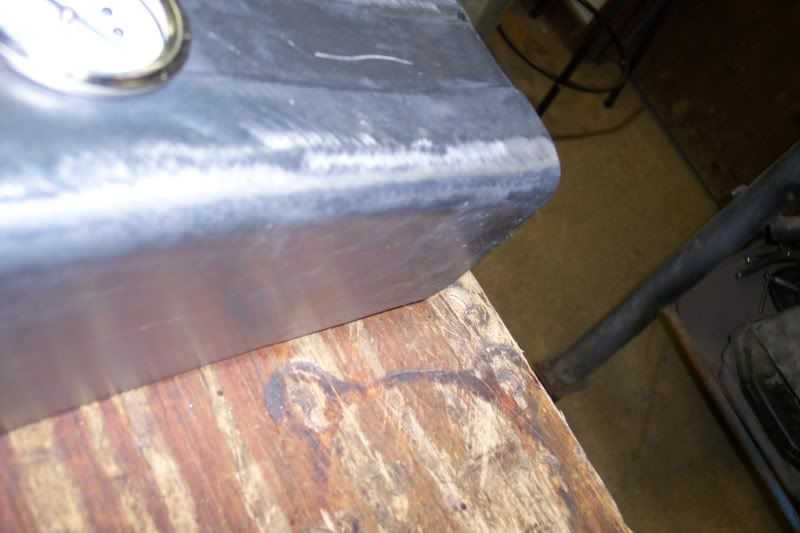
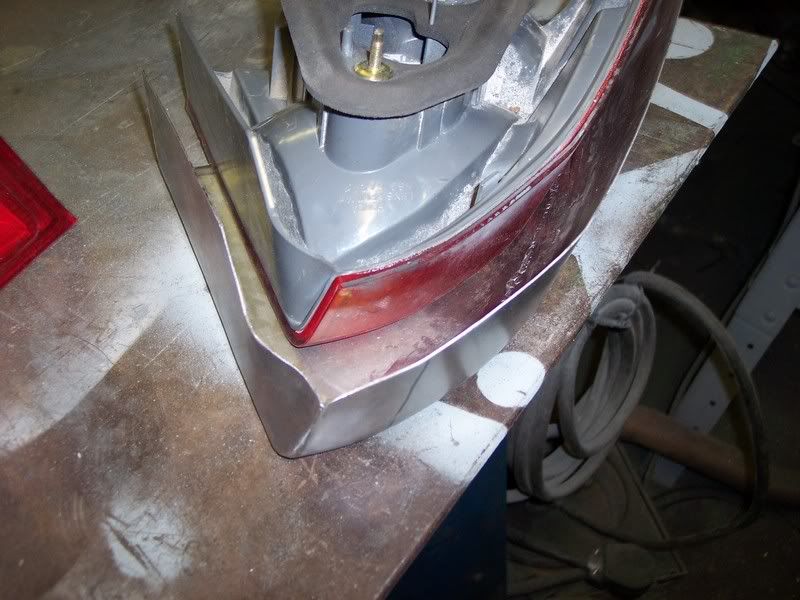
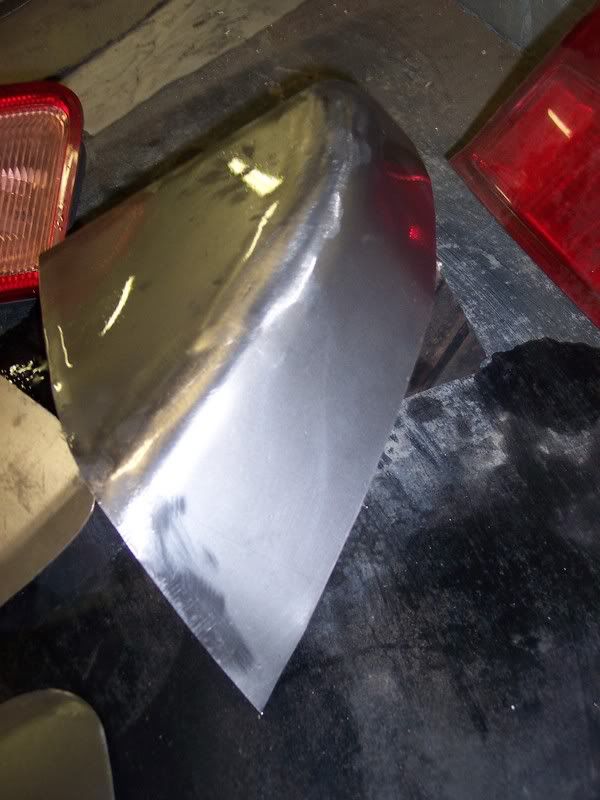
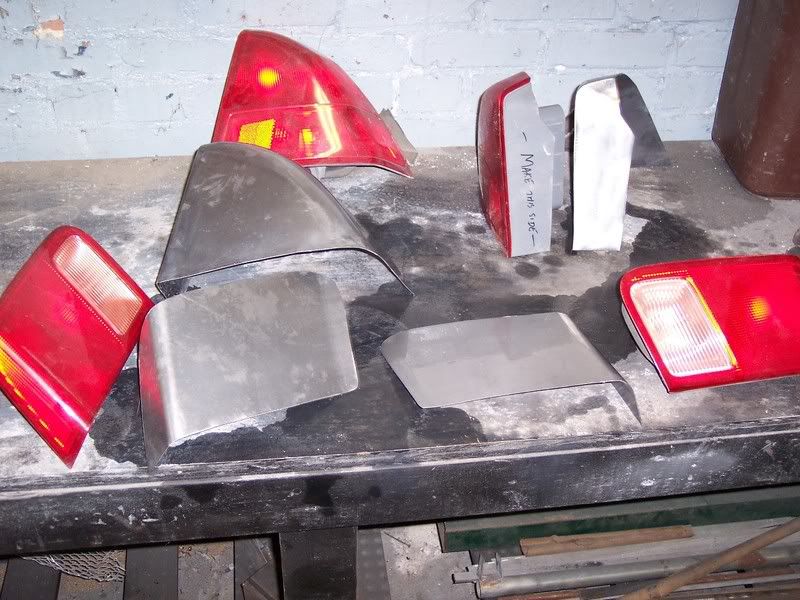
    some kid from another state wanted me to make some tail light fillers for his honda, he wanted to use leds in his bumper , so the stock lights had to go.. he sent me his stock lights and i made the fillers off of them..
    you can see and compare how close i got the metal to stock ..


  5. Default

    heres another one i did.. hopefully not boring anyone with pics.. lol..
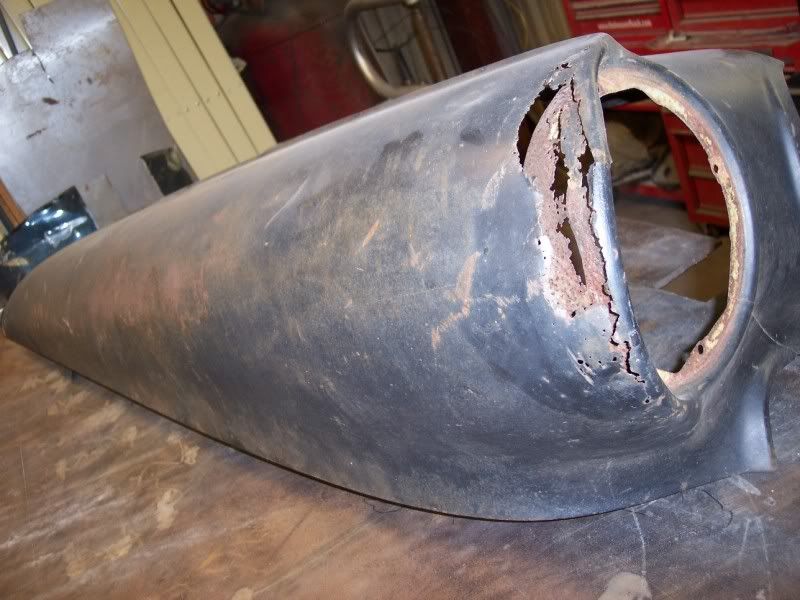
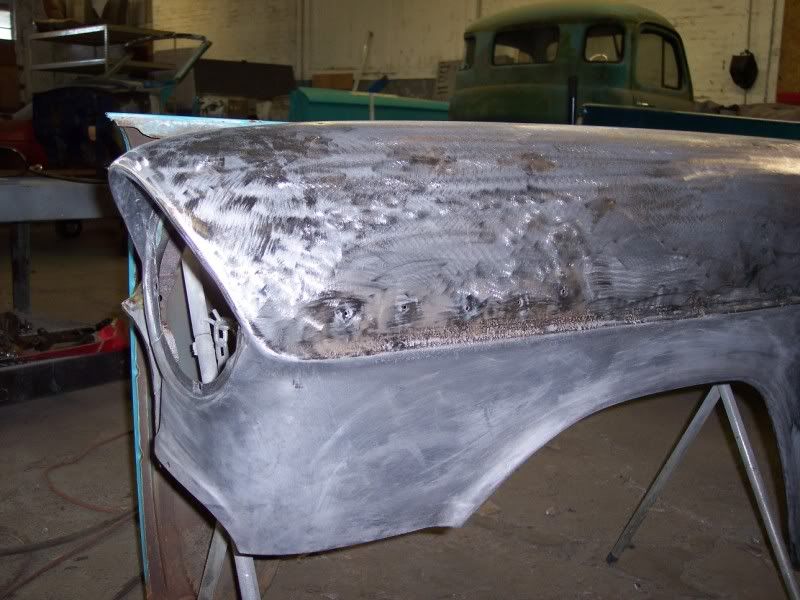
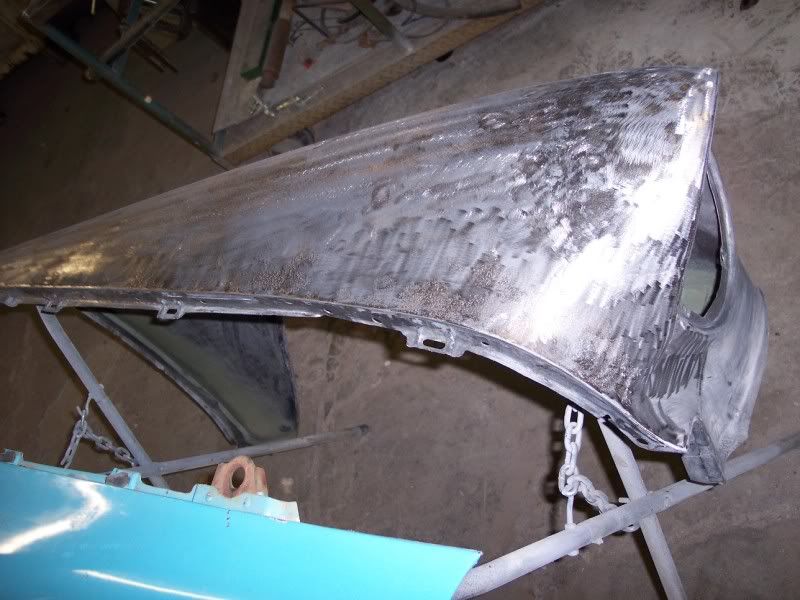
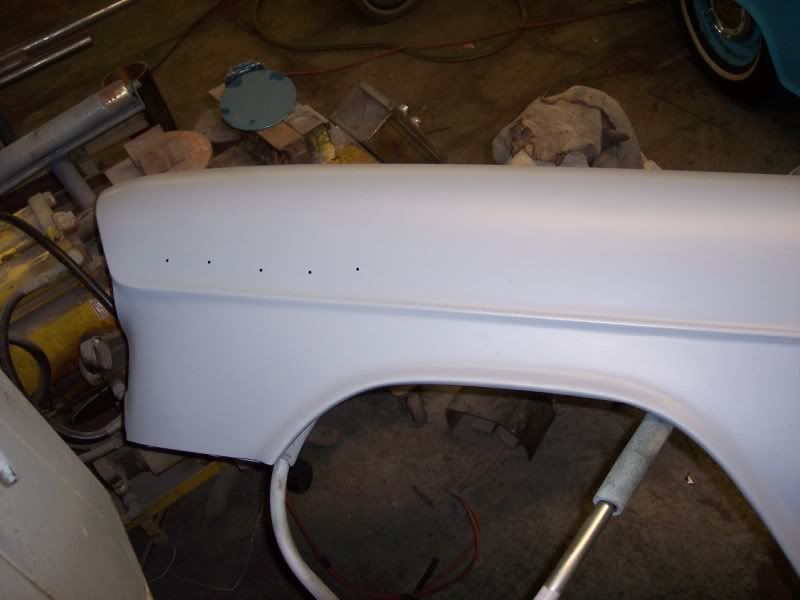
    55chevy fender.. customer wanted to use stock , so he wanted me to bring back to life this fender... it was rusted , damaged all over, and all types of stuff. wouldnt even fit back on the car...

    after making some metal pieces and shaping.. i got this.. not done , but close..


    little bit more metal shaping , then skim coat of filler, then high build primer.. ready for paint!

  6. #26
    Join Date
    Aug 2009
    Location
    Albuquerque, NM
    Posts
    22

    Default

    Oh wow, McClary, a truly nice job. You should requst some finished pics of the car from the owner. Bet he has the one and only. Do you have a website? It would be great to see what you offer.

    Goat

  7. #27
    Join Date
    Aug 2009
    Location
    Albuquerque, NM
    Posts
    22

    Default

    Our posts crossed, the fender looks really good too. You have a true talent. By all means, keep the pics coming, they are great.

    I'll try to post some pics soon, as I'm building instumentation chassis out of aluminum for my work. These instruments are used in the field to collect machine data for vibration analysis. Not nearly as exciting as the work you are doing, but fun none the less.

    Goat

  8. #28

    Default

    Very nice work McClary.

    What type primer did you use, lacquer? Looks like you have a lot of talents, not just the metal.

    Now take some rain-x and wipe his sharpie markings off and send it back. He will swear his marked them.

    As Goat said, please keep the pictures coming.
    Mike R.
    Email: admineverlast@everlastwelders.com
    www.everlastgenerators.com
    www.everlastwelders.com
    877-755-9353 x203
    M-F 12 - 7PM PST
    FYI: PP50, PP80, IMIG-200, IMIG-250P, 210EXT and 255EXT.

  9. Default

    Quote Originally Posted by everlastsupport View Post
    Very nice work McClary.

    What type primer did you use, lacquer? Looks like you have a lot of talents, not just the metal.

    Now take some rain-x and wipe his sharpie markings off and send it back. He will swear his marked them.

    As Goat said, please keep the pictures coming.
    on the primers, i use PPG Epoxy for the bare metal/bodyfiller ... after that , i use PPG K-36 high build primer on top of the epoxy....

    thanks for the kind words....

    now every day i become eager to wanting a plasma cutter... its driving me nuts now after i decieded to buy one, using a torch is getting old...

    any word on when its coming in ?

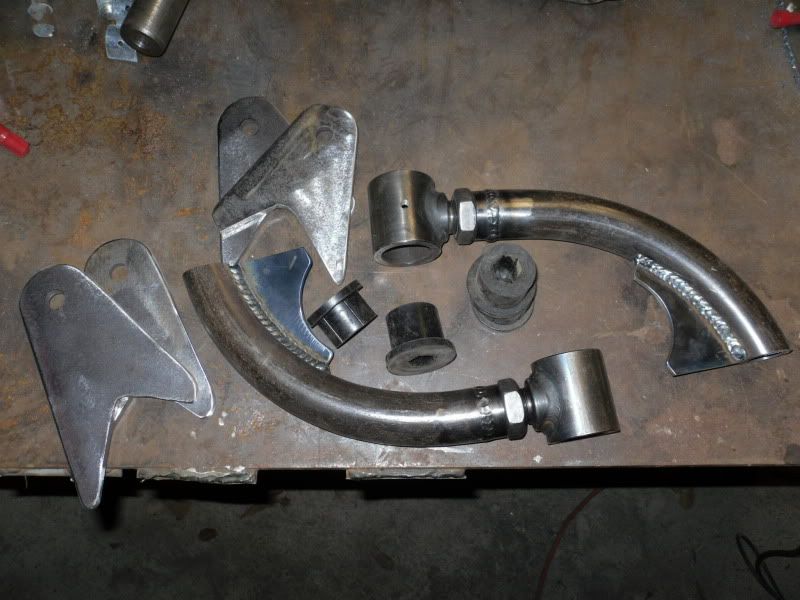
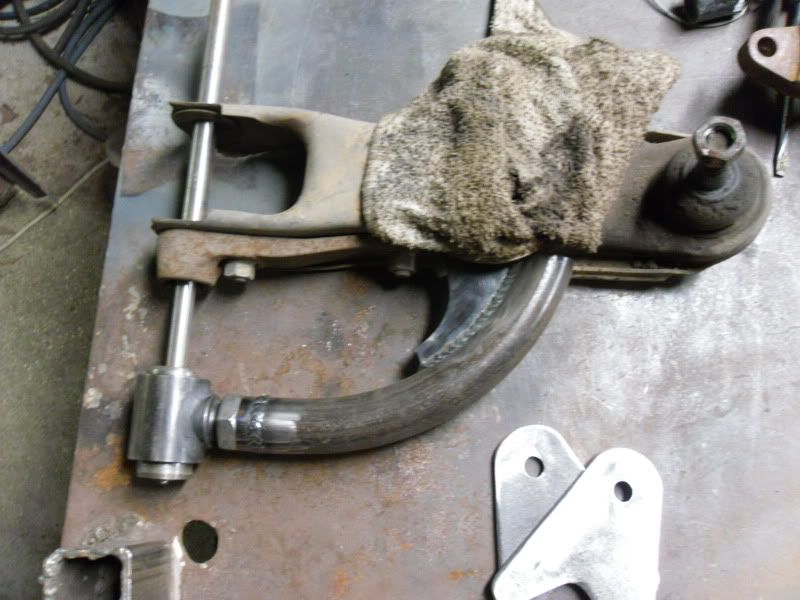
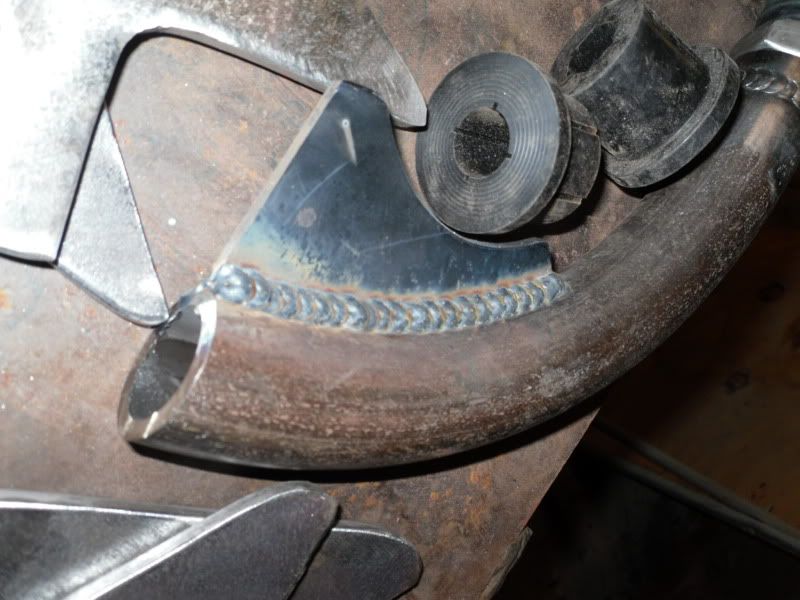
    heres what i did today for a Nissan truck... the guy ask me to build a reverse radius(stablizer) arm, for his lower control arm.. so with just using some old nissan arm for mock up .... i made this... and i used a torch to cut the flat plates.... oh man.... i need a plasma !!!! haha

    this is what he got , i made the arms , plates....

    heres where it will be needed to be welded onto his lower control arms(those arms are just old mock up arms.. lol)


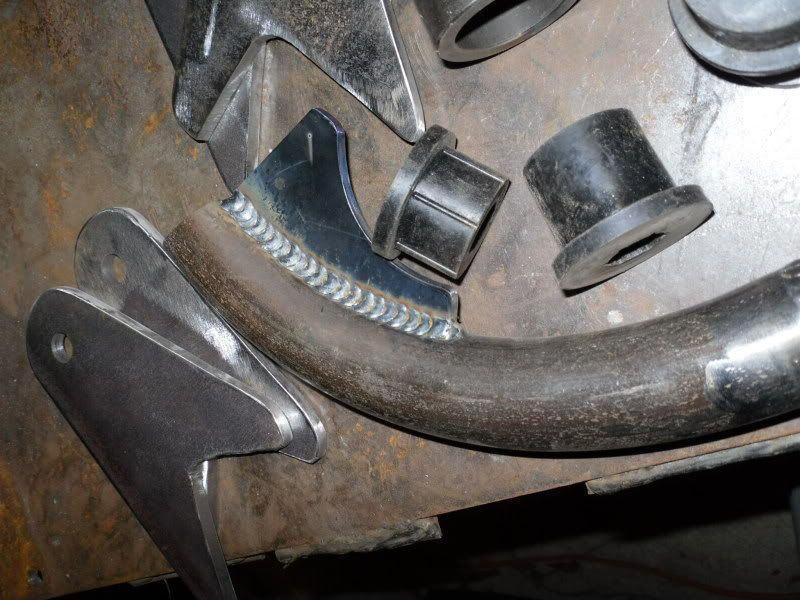
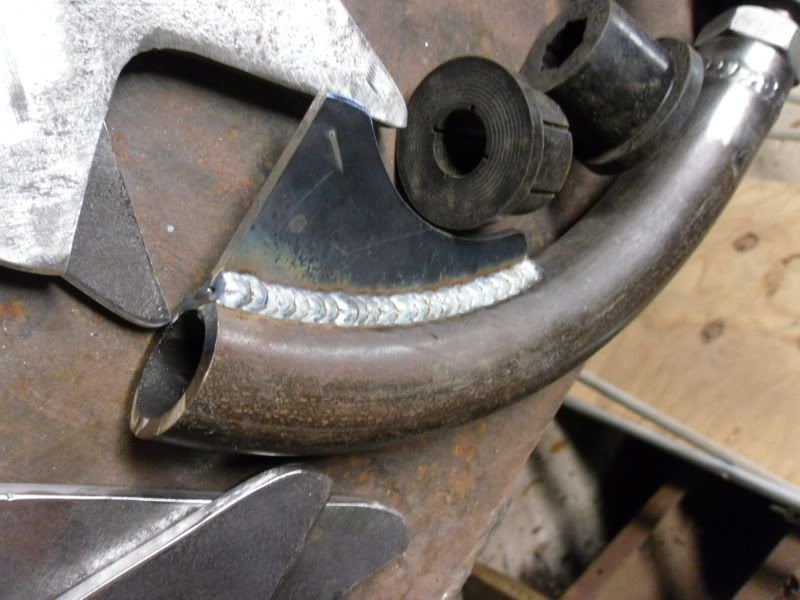
    heres some close ups of some welding....
    i used a mig welder on this one.... .035 wire...


  10. #30
    Join Date
    Aug 2009
    Location
    Albuquerque, NM
    Posts
    22

    Default

    McCLary,

    Niiiiice MIG work man, almost looks TIG. Keep up the good work.

    Goat

  11. Default

    Quote Originally Posted by The Goat View Post
    McCLary,

    Niiiiice MIG work man, almost looks TIG. Keep up the good work.

    Goat

    Agreed. I have seen others make Mig Welds look like Tig welds. Can you explain the technique for accomplishing this look? also, can you only do it on thicker pieces?

  12. #32
    Join Date
    Aug 2009
    Location
    Albuquerque, NM
    Posts
    22

    Default

    Good question BurningMetal,

    McClary, please do tell. I do quite a bit of MIG work, but never that good looking. I have to come clean and admit that my welder is not an Everlast, but a Hobart that I bought a number of years back. However, that shouldn't affect the quality of the welds, I believe it to be the operator. ;-)

    Goat

  13. Default

    hard to explain, different metal thickness , different technics..

    basicly its a really long "L" motion...
    i run the welder hotter then needed, then start on a spot and let it burn(puddle up) and build , then take a long sweep out , then pause and let it build(puddle up), then another long sweep out.. like an "L" ... but im doing this real fast... and running hot...
    its strong, but more for looks. if i need it stronger, i wont do this method, ill do "C"s and it will look more like dimes stacked up then more spread out like i just did...

    hope that helps some...

  14. #34

    Default

    McClary,

    Once again great work. The TIG look is cool. I've done that with a stick welder and 60xx rod. My son looked at all the beads once and said I thought you were going to use the stick on this, did not want to waste argon. Mine were not as nice as yours though. But they fooled him.

    Without a plasma I would be lost. Alex will be back from Fabtech Thursday or Friday. So my guess is Friday or Monday they start to ship. They are expected during the show. Sorry about the delay, but timing was bad on this order.

    It will be worth the wait for sure. Also, you will save a lot on O/A after you get it. Bending and rusty bolts are all I use it for, well AC/plumbing for friends. And you can cut bolts off with the plasma too. Bought my Dad one last year and he still emails me when he uses it.
    Mike R.
    Email: admineverlast@everlastwelders.com
    www.everlastgenerators.com
    www.everlastwelders.com
    877-755-9353 x203
    M-F 12 - 7PM PST
    FYI: PP50, PP80, IMIG-200, IMIG-250P, 210EXT and 255EXT.

  15. Default

    Quote Originally Posted by McClary View Post
    hard to explain, different metal thickness , different technics..

    basicly its a really long "L" motion...
    i run the welder hotter then needed, then start on a spot and let it burn(puddle up) and build , then take a long sweep out , then pause and let it build(puddle up), then another long sweep out.. like an "L" ... but im doing this real fast... and running hot...
    its strong, but more for looks. if i need it stronger, i wont do this method, ill do "C"s and it will look more like dimes stacked up then more spread out like i just did...

    hope that helps some...
    I am not really following the "L" motion, but I think I understand. also, it doesn't sound like you could succesfully do this technique on 16 gauge or thinner sheetmetal. I would envision lots of burn throughs!

  16. Default

    Quote Originally Posted by everlastsupport View Post
    McClary,

    Once again great work. The TIG look is cool. I've done that with a stick welder and 60xx rod. My son looked at all the beads once and said I thought you were going to use the stick on this, did not want to waste argon. Mine were not as nice as yours though. But they fooled him.

    Without a plasma I would be lost. Alex will be back from Fabtech Thursday or Friday. So my guess is Friday or Monday they start to ship. They are expected during the show. Sorry about the delay, but timing was bad on this order.

    It will be worth the wait for sure. Also, you will save a lot on O/A after you get it. Bending and rusty bolts are all I use it for, well AC/plumbing for friends. And you can cut bolts off with the plasma too. Bought my Dad one last year and he still emails me when he uses it.
    thanks again for the comments!
    i look forward to this plasma cutter, i havnt paid for it yet.. i was just waiting for the call saying its in stock.. but if theyre in or soon to be in , ill go ahead and call alex this week and pay for it... really really look forward to this thing..
    i got sooooooooooooooooooooo much to cut up around here! hahah..

    nice story about your stick welds.. thats the best part when people cant tell what welding method you used.. lol

    Quote Originally Posted by BurningMetal View Post
    I am not really following the "L" motion, but I think I understand. also, it doesn't sound like you could succesfully do this technique on 16 gauge or thinner sheetmetal. I would envision lots of burn throughs!
    when i speak of the "L" , its like doing the C method, but stopping some and moving the wire down alot more then normal, and stopping again to form the puddle.. just back and forth... like i said, hard to explain for me....

    what are you welding up on the 16gauge?
    eventhough this weld method wont be AS strong, but it will hole . you can do that with 16gauge, somewhat... do it different... instead of holding the trigger, you form the puddle and move real quick to a new spot and form another puddle... again , the welder got to be running hot, and you will need faster wire speed.... this is not a real good structural weld, due to the cold starts ... but if you got the welder on a hotter setting, it will work decent.. main thing is to try it and cut it in half and make sure you got some good penetration...
    this is how i do it sometimes with thinner metal, and im sure theres alot of others with better welds and better methods then me.. .but i learn more on hands on then anything...
    hope that helped some....

  17. #37

    Default

    thanks again for the comments!
    i look forward to this plasma cutter, i havnt paid for it yet.. i was just waiting for the call saying its in stock.. but if theyre in or soon to be in , ill go ahead and call alex this week and pay for it... really really look forward to this thing..
    i got sooooooooooooooooooooo much to cut up around here! hahah..

    nice story about your stick welds.. thats the best part when people cant tell what welding method you used.. lol
    It looks really good, as all your projects. Nice to MIG and it look like TIG. TIG is the look I like, but MIG is so much faster. I will have to try wrapping the "L" pattern and see what I get.

    On the stick I was tabbing 6010 and hot. Sure 6011 and probably 6013 would do it. Looked just like TIG and smaller than dime. And no question, that metal will not come apart at the weld.

    We should have units going out next week. The ones at the show were flown in (do not ask how much that cost). What unit are you ordering. We had a little of everything at the show.
    Mike R.
    Email: admineverlast@everlastwelders.com
    www.everlastgenerators.com
    www.everlastwelders.com
    877-755-9353 x203
    M-F 12 - 7PM PST
    FYI: PP50, PP80, IMIG-200, IMIG-250P, 210EXT and 255EXT.

  18. Default

    if i remember right, i was ordering the supercut50 plasma cutter...

    its really hard to explain how i weld, somedays i get ok welds, other days just all messed up looking welds...

    im still working on getting nice tig welds, alot of it i think is due to my old tig machine... one day ill upgrade... this thing is soo big and bulky...

  19. Default

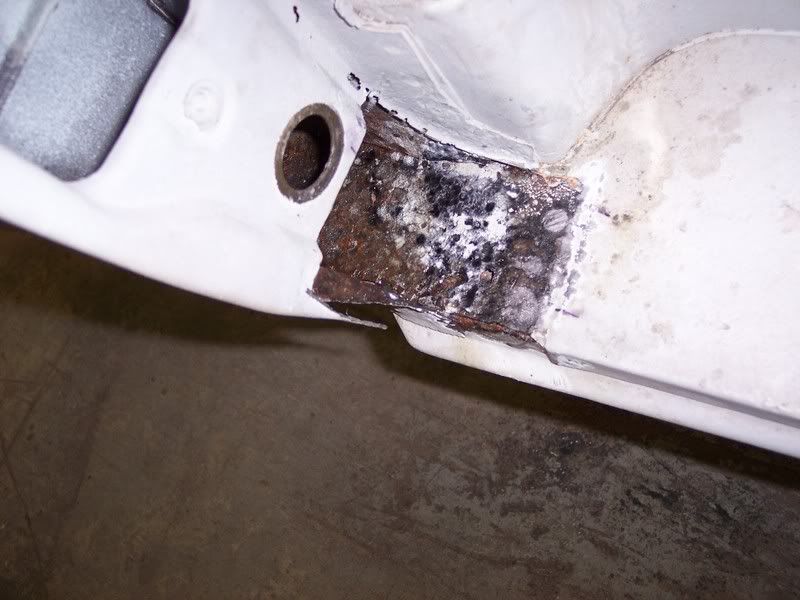
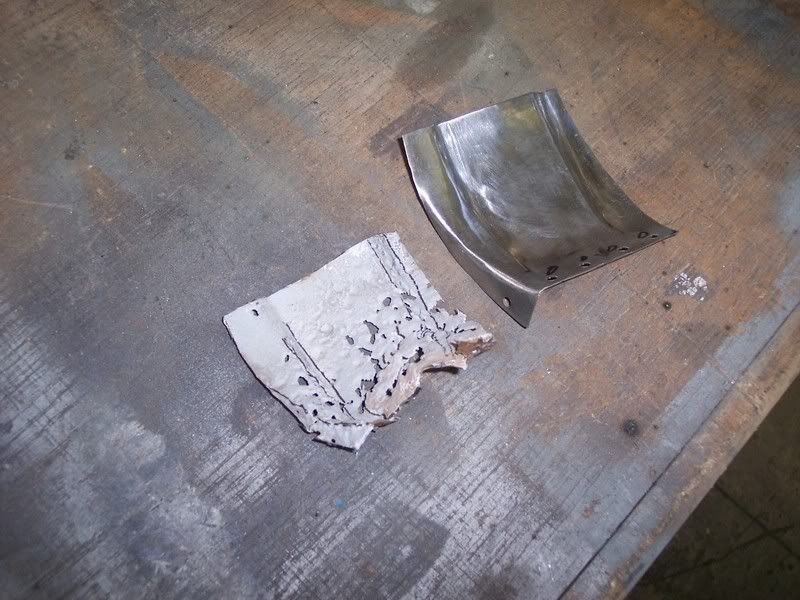
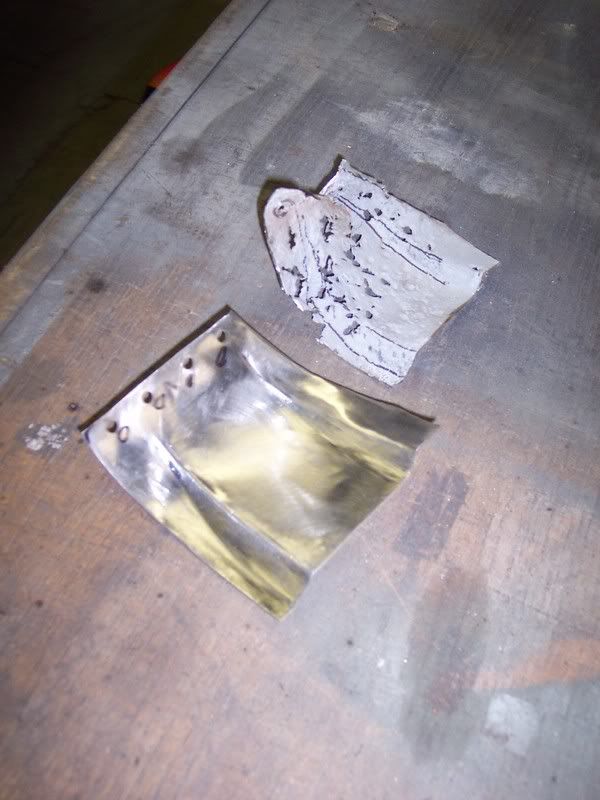
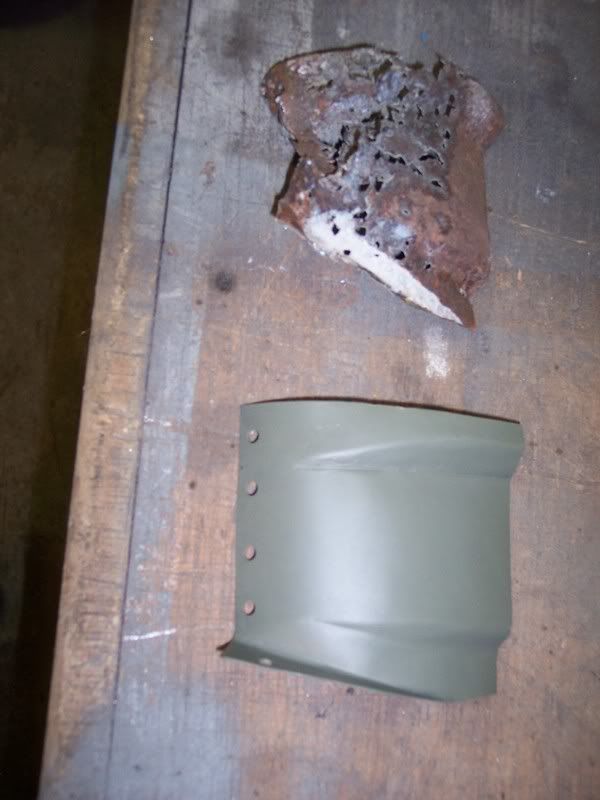
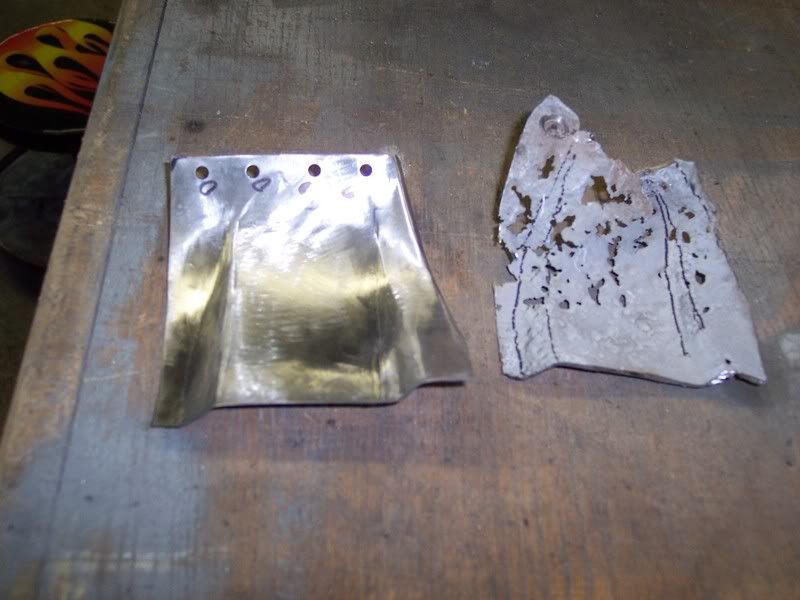
    just a few more random pictures... dont look like much , but it was tricky making the curve with the lines taping in and out...

    old rusty part cut out..

    old part compare to new part i hand made... no welding , all one peice metal..


    primed the back since i wont be able to after welding it back in the truck


  20. Default

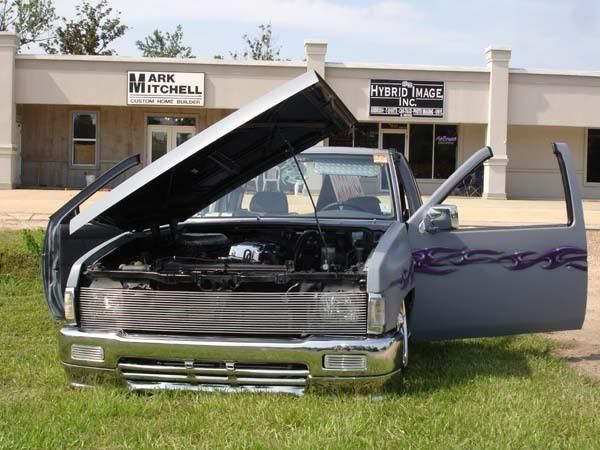
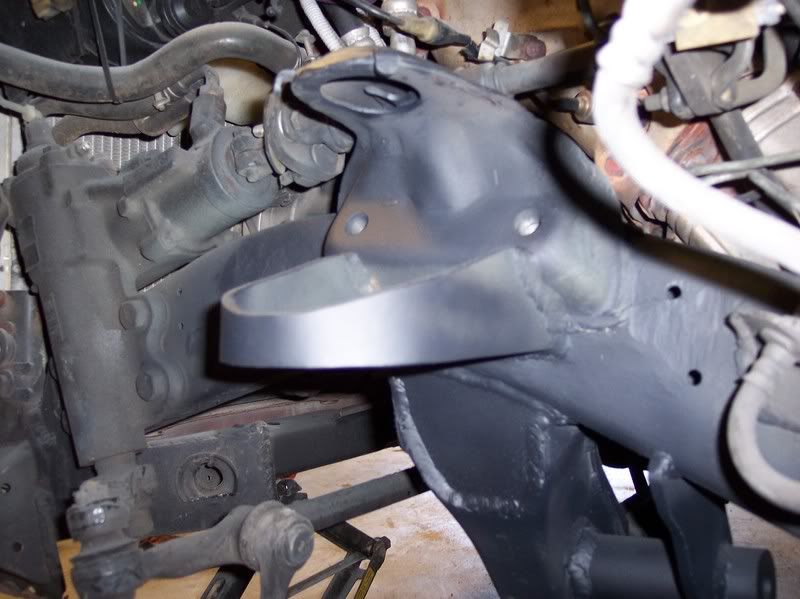
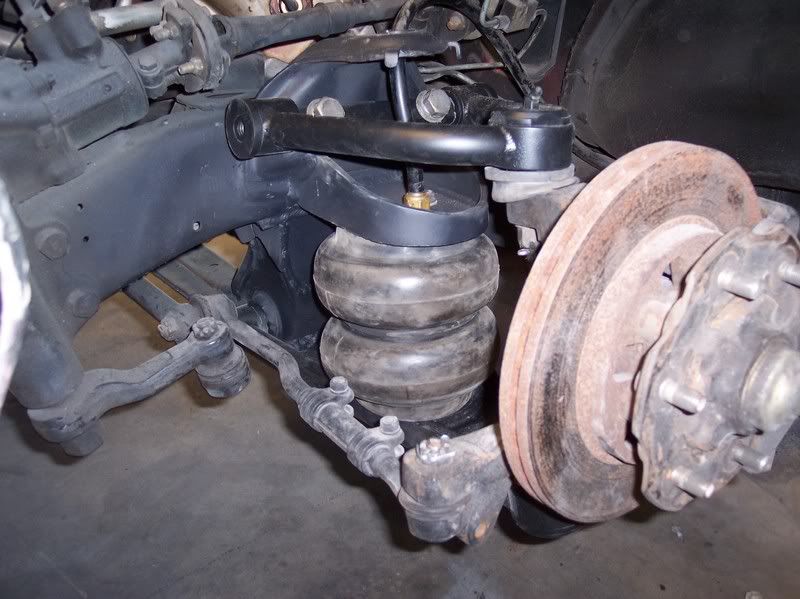
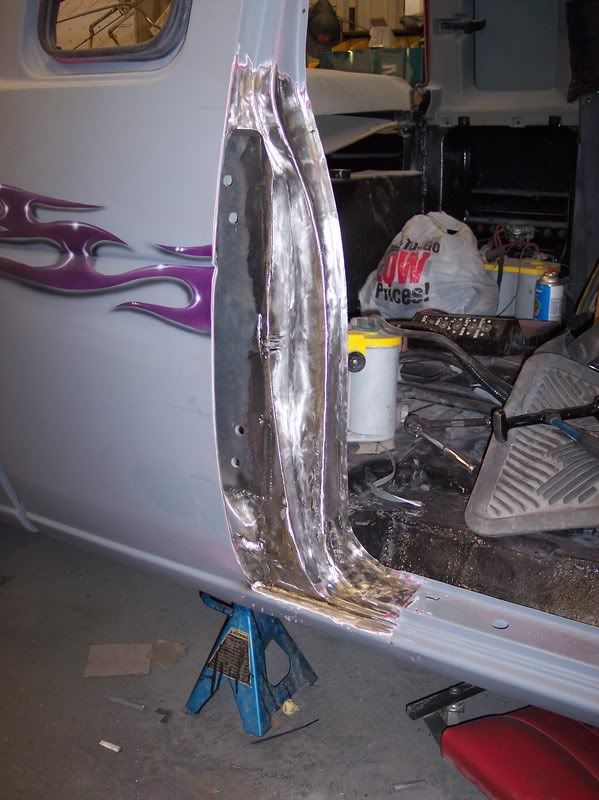
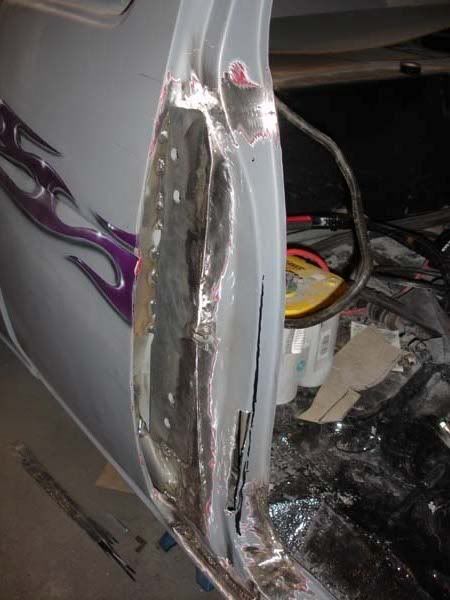
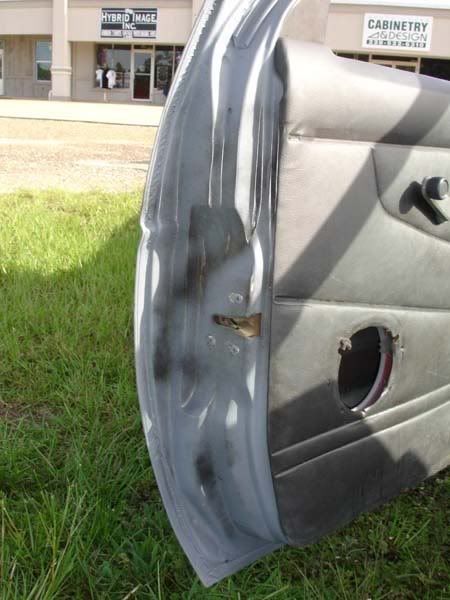
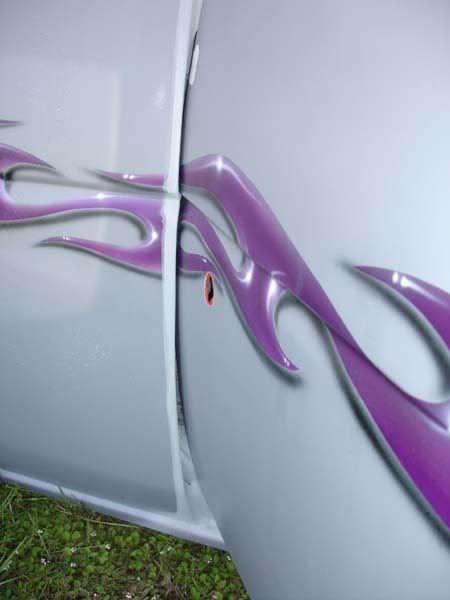
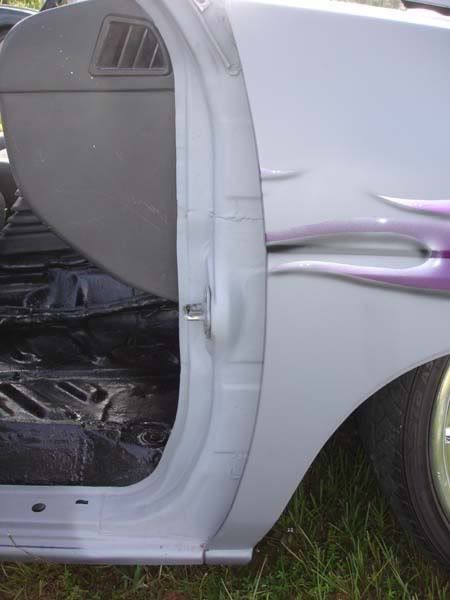
    heres an old school type truck i built for a customer...

    too many things to list... but air bagged , channeled to the ground, tilt hood, suicide doors , custom suspension and alot more....

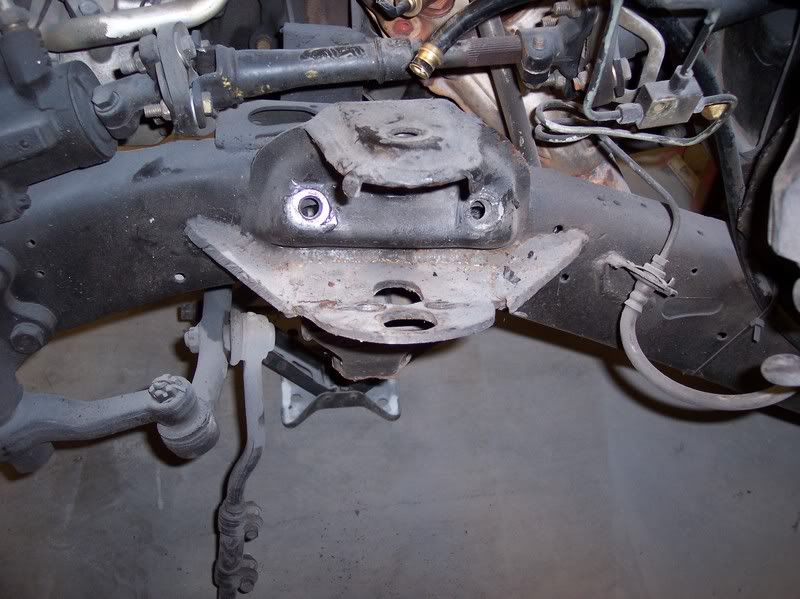
    this was what USE to be on it from ANOTHER shop.front suspension airbag plates...
    before..

    this is AFTER , i made a new bracket , cut the old crap off and reworked it.new control arms too.


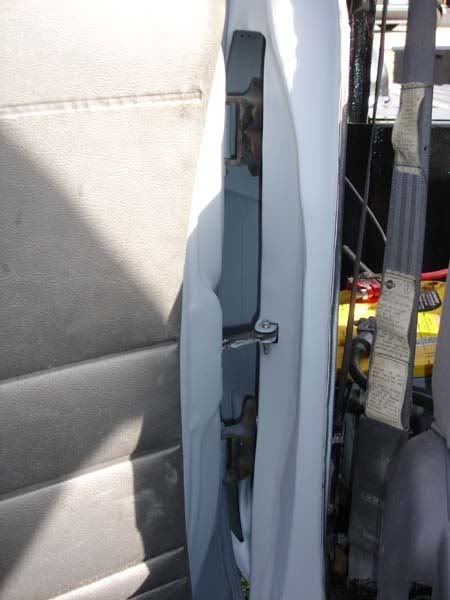
    heres where im making parts and etc for doing Suicide doors using the STOCK hinges (OLD hot rod ways)


    even put in the door stopper so the door dont open too far..

Posting Permissions

  • You may not post new threads
  • You may not post replies
  • You may not post attachments
  • You may not edit your posts
  •