


Got to work on some of the electrical. I'm not a neat person and my buddy volunteered to help me wire it. I think the dash came out looking pretty decent. Eventually I'm going to have a pro redo all the sheet metal and put in a new dash, but for now this serves it purpose.
I moved on to the rear suspension after that. Got the new arms in, but before I did I had to take them to another buddy and have him move the mounts backwards a few inches so the shocks would clear the frame.
Added in some extra support for the rear arms and made sure everything was in double-shear.
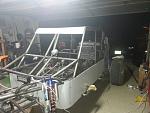
Eventually it came to the point where it could hold itself up under its own power.
After that I put on some skin just to keep myself from getting literally sandblasted.

 Reply With Quote