Hello again and today I will be showing you how to make your very own foot pedal for your Tig welder.The only part you will need from your existing foot pedal is the cable with the 7 pin connector that attaches to your welder.Please note I am covering the 47k ohms foot pedal which is found on the PowerTig 200DX and any other pedals that uses a 47k ohms potentiometer.The total cost can be any where from $50 to $90 depending on where you source the parts.
Parts needed:
Qty (1) Vox 845 black power coated or 847 chrome foot pedal (you can find them on eBay from $45 to $70)
Qty (1) SPDT - momentary push button switch for $4.50 http://www.ebay.com/itm/370820332929...84.m1439.l2649
Qty (1) 3/8 Rubber grommet pack of 10 for $8.00 http://www.ebay.com/itm/BB24-PK-of-1...c65cb4&vxp=mtr
Qty (3) 90 deg Torsion springs http://www.mcmaster.com part# 9271K56 pack of 6 for $7.79
Qty (2) 100k resistors pack of 5 for $2.00 or Qty (1) 50k ohms potentiometer $8.00
Parts Optional:
Aluminum foil tape (to help keep the dust out)
Shrink wrap sleeves (to keep the wires organized)
1/4'" Nylon cable clamps (to keep the wires down)
Tools needed:
Solder iron and wire
#2 Philips screw driver
Pliers or wire cutter
Drill and bits 1/4 and 1/2
Small punch and hammer
Silicone grease or any other thats available
I also want to mention that the reason I chose the VOX pedal is because its very durable,light weight and low profile.The rack & pinion design makes it great for precision and control.
Step 1:
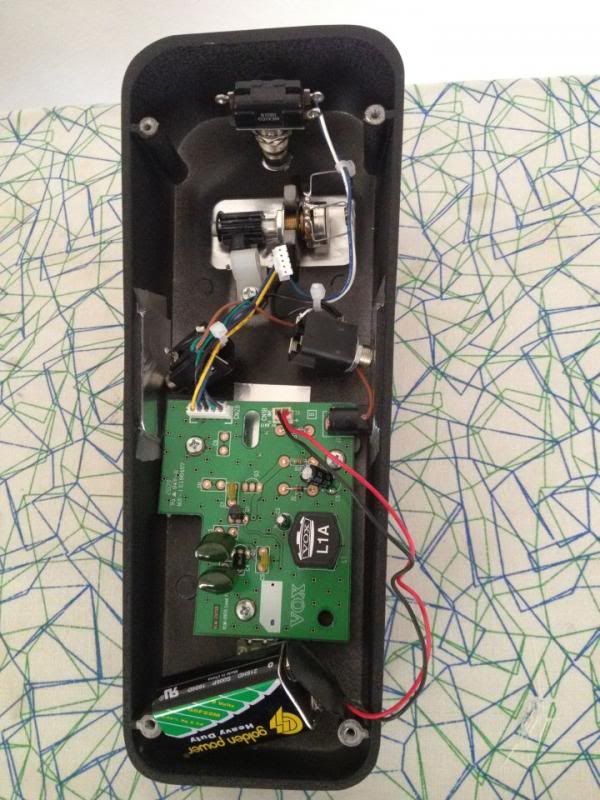
Open the VOX foot pedal by unscrewing the 4 screws located under the foot pedal.Remove the circuit board,wires,switch and (optional) head phone female jacks.
Step 2:
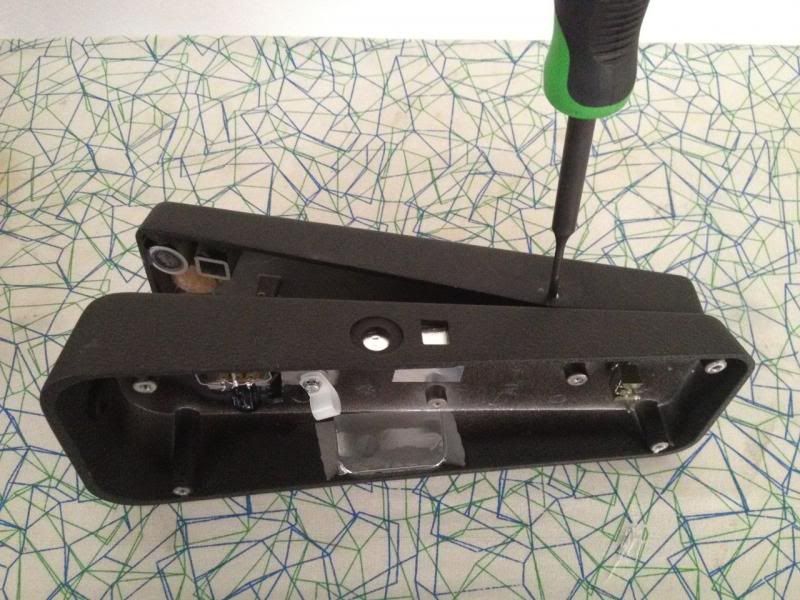
Use the pliers to remove the 2 nuts and bolts that is holding the shaft down.Then use the punch and hammer to remove the shaft and to separate the 2 halves Please note that the shaft goes in and out one way so mark one side and place the punch on the pointed side of the shaft not the flat side.
Step 3:
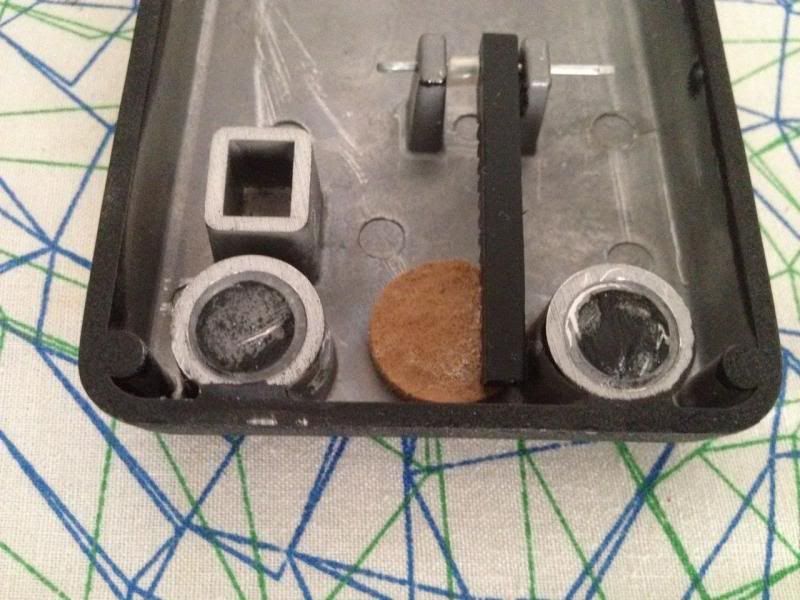
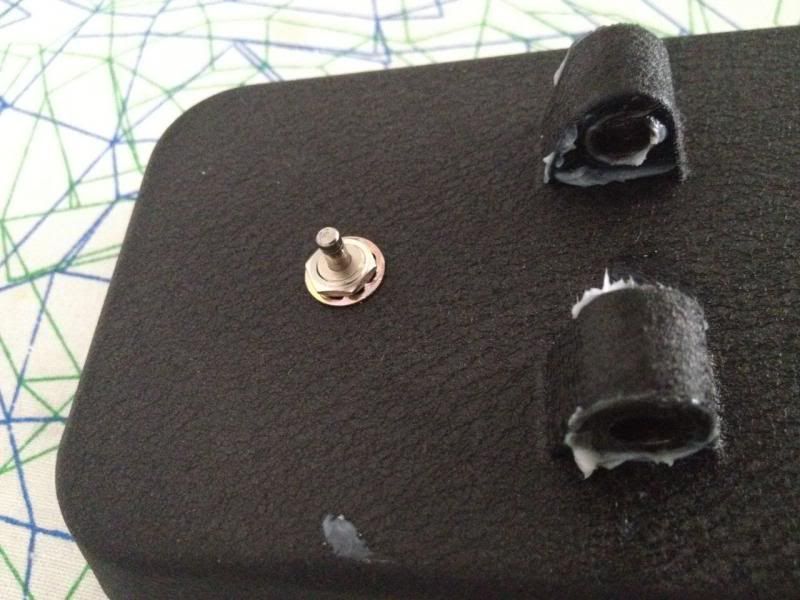
Remove the 2 round rubber cushions from the top half of the pedal.I already removed them in this picture but you can still see a little black residue from them.Doing this will give the foot pedal 100% travel from 0k ohm to 50k ohms.
Step 4:
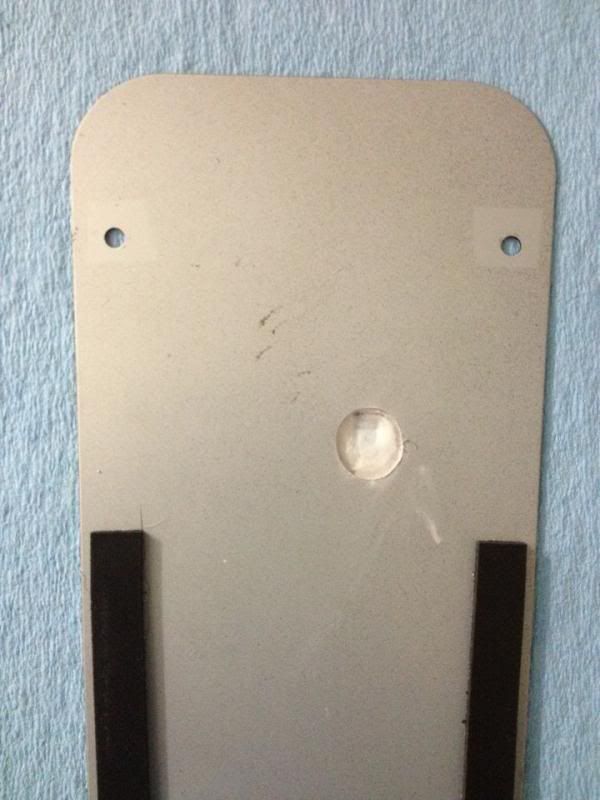
Installing the SPDT switch is very easy,there is already a small hole at the base of the bottom half of the pedal from when you removed the nut and bolt.Just use the 1/4" drill bit and widen the hole then install the switch and lock it in place with the lock nut.
Step 5:
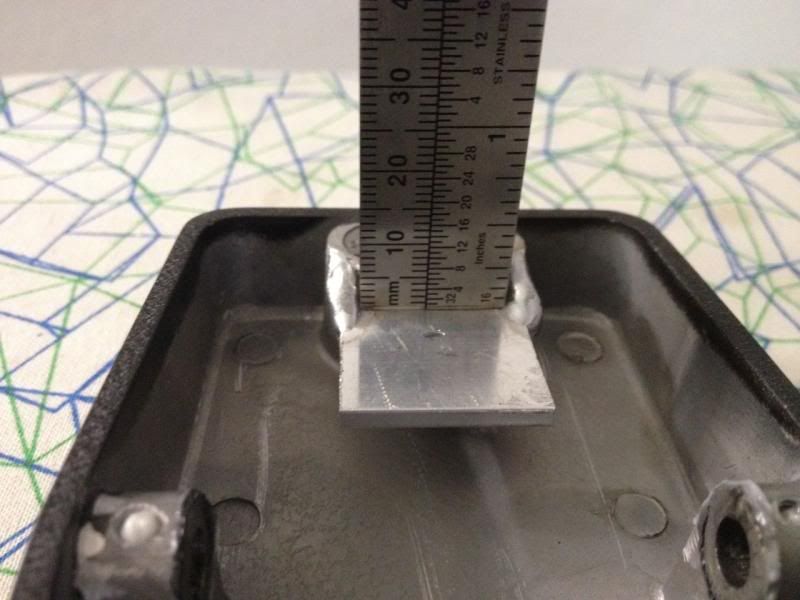
Next is welding a small piece of aluminum on the top half of the pedal to active the switch.I used a 1/8" thick aluminum bracket and 5mm from the bracket to the top is perfect.Remember to remove the rubber cushion before welding and try not to weld for too long just 2 tacks is good enough.
Step 6:
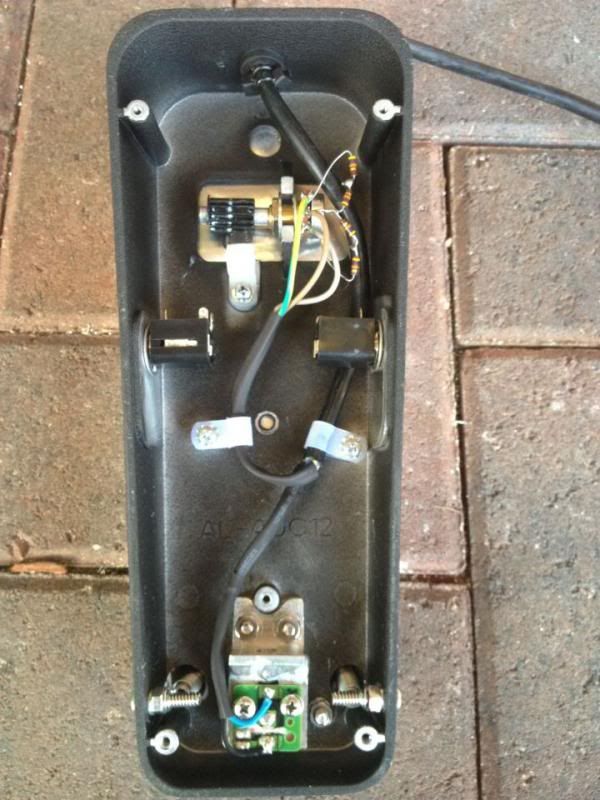
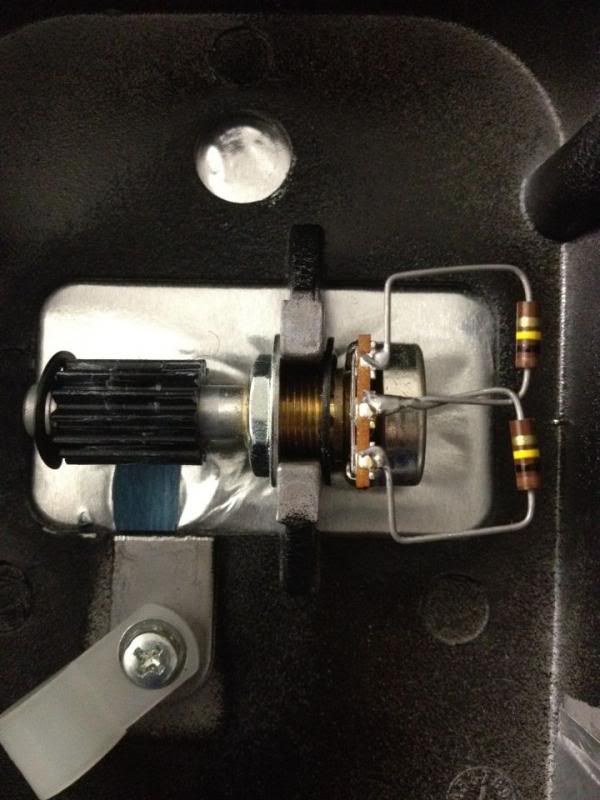
Take the (2) 100K resistors and solder them just as shown in the picture,doing this will give you linear control by cutting down the original potentiometer that was 100k ohms to now 50k ohms Or you can install your own potentiometer with the correct value.
Step 7:
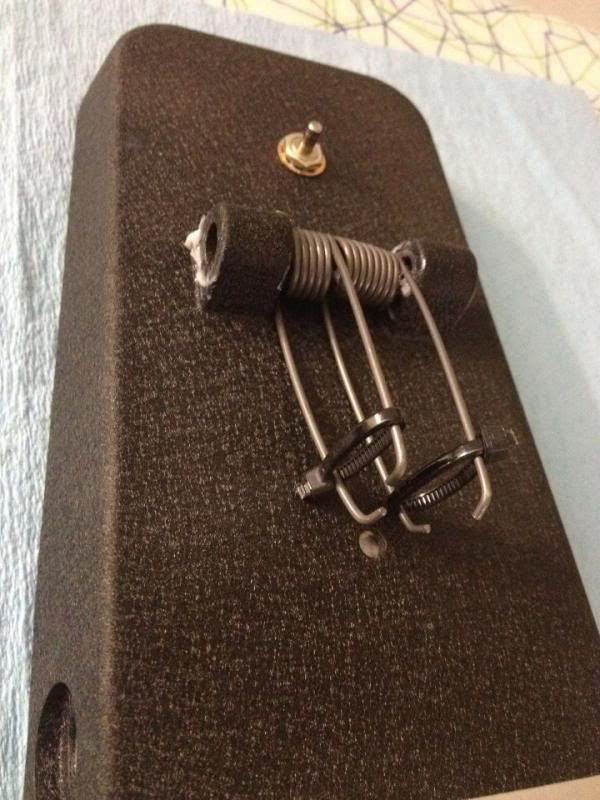
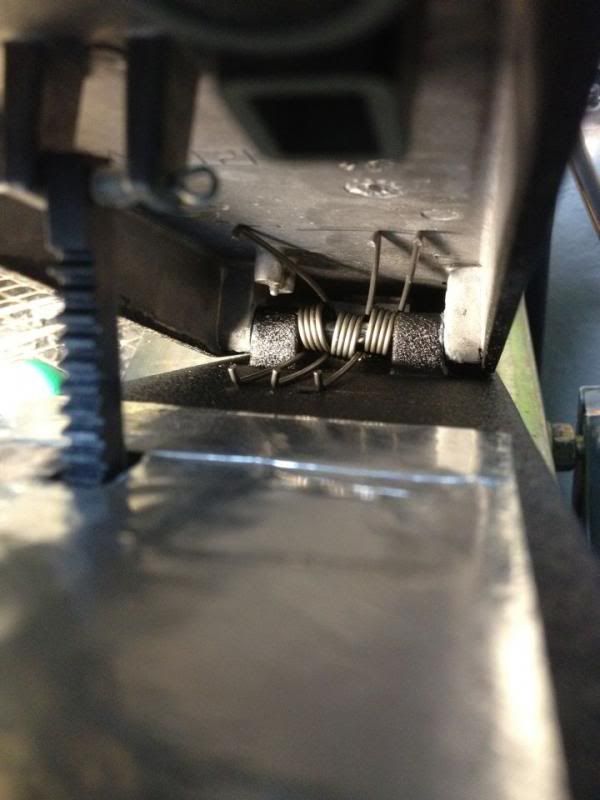
Its now time to reassemble the pedal but before you do that the torsion springs have to be compressed.So follow exactly as shown in the picture using zip ties and reinstall the shaft,Wear safety glasses.
Step 8:
After assembly drill a 1/2" hole at the front and install the rubber grommet and document the cable pin outs and remove it from your old pedal then push it through the grommet.
Step 9:
Adjust the rack & pinion in the correct position and install the base, mark the spot where the rack is making contact then drill a 1/2" hole and re check for proper clearance.
Step 10:
Solder the wires to their correct locations ,reinstall the base screws.Your foot pedal should look like this when you are done.



 Reply With Quote