Share
Page 2 of 3 FirstFirst 123 LastLast
Results 21 to 40 of 56

Thread: Cart Build

  1. Default

    Quote Originally Posted by Jason View Post
    Any concern that you will pile too much wait towards the front of the top shelf?
    Not really. Before deciding on axle and caster locations, I made sure I could load a bottle with nothing on the shelf and that the welder was stable with the bottle removed. I can sit on the front of the upper tube and it deflects about 1/4" (I'm 175#) but the rear wheels stay on the ground.

  2. #22

    Thumbs up

    Quote Originally Posted by its_34 View Post
    Not really. Before deciding on axle and caster locations, I made sure I could load a bottle with nothing on the shelf and that the welder was stable with the bottle removed. I can sit on the front of the upper tube and it deflects about 1/4" (I'm 175#) but the rear wheels stay on the ground.
    ok cool... I just realized I used an incorrect spelling.... Wait = weight
    Jason
    Everlast 255EXT - Perfection
    Everlast PowerPro 256 - UPS Demolished
    Everlast MTS200s
    12 Ton Shop Press
    DeWalt Hand Tools/ChopSaw

  3. Default

    I blame autocorrect! Fortunately, there are few grammar police here.

  4. Default

    Picked up some more aluminum sheet yesterday and finally finished off the bottom shelf. I'm going to have to replace the rear wheels though, these are just too soft to take the weight.

    Click image for larger version. 

Name:	19.jpg 
Views:	394 
Size:	125.8 KB 
ID:	10763

    Click image for larger version. 

Name:	21.jpg 
Views:	365 
Size:	145.2 KB 
ID:	10764

  5. #25

    Default

    Quote Originally Posted by its_34 View Post
    I blame autocorrect! Fortunately, there are few grammar police here.
    I blame it on sleeping 3 to 4 hrs every night

    Anyways on topic, it seems to me that it almost needs a handle to pull/push it by..I assume you use the one straight off the front? but how high is that? Do you have to bend over to reach it?
    Jason
    Everlast 255EXT - Perfection
    Everlast PowerPro 256 - UPS Demolished
    Everlast MTS200s
    12 Ton Shop Press
    DeWalt Hand Tools/ChopSaw

  6. #26
    Join Date
    Oct 2011
    Location
    Litchfield Park, AZ
    Posts
    370

    Default

    That is a nice cart. I have been following the thread and like the tube look.
    Miller 252
    PowerTig 250 EXT
    Evolution Rage 2
    48X6 inch Belt Sander w/ 9 inch Disk Sander
    ...

  7. Default

    Quote Originally Posted by DVA View Post
    That is a nice cart. I have been following the thread and like the tube look.
    Thanks. I tend to use round tube most and end up using the remnants for everything else.

  8. Default

    Quote Originally Posted by Jason View Post
    Anyways on topic, it seems to me that it almost needs a handle to pull/push it by..I assume you use the one straight off the front? but how high is that? Do you have to bend over to reach it?
    I just pull it by the front loop. It's probably 28" off the floor but would be tough for a long walk. One regret is that I should have pushed the upper tube forward a couple inches more so I could get more clearance to the bottle. I wanted to keep the torch connection behind the tube for protection. I may bend a small diameter loop and put it at the front, about 6-10" higher. That would solve both issues.

  9. #29

    Default

    What are the specs for the frame tubing ?
    2013 250EX : SSC Pedal : I-MIG 250P 20' Profax gun : Power Plasma 60 p80 torch : 3M Speedglas 9100XX : Evolution Rage 3 DB cold saw

  10. Default

    Quote Originally Posted by zoama585 View Post
    What are the specs for the frame tubing ?
    It's a mixture. The bottom tube is 1.5x.120 DOM, top is 1.5x.095 ERW and the bottle post is 1.5x.065.

  11. #31
    Join Date
    Oct 2012
    Location
    Canada, Suttonwest, Ontario
    Posts
    676

    Default

    Quote Originally Posted by its_34 View Post
    It's a mixture. The bottom tube is 1.5x.120 DOM, top is 1.5x.095 ERW and the bottle post is 1.5x.065.
    Are you just using up odd and ends or did you design it that way.
    Everlast PowerTig 325EXT (Canada)
    Everlast Power I Mig 250 (Canada)
    Everlast PowerPlasma 80S (Canada)
    Everlast PowerCool W300 (Canada)
    Everlast PowerMTS 250S Fitted with a 30A Spoolgun(Canada)
    Miller Dynasty 400 wireless(Canada)
    Millermatic 252 plus 30A Spoolgun(Canada)

  12. Default

    Quote Originally Posted by Kempy View Post
    Are you just using up odd and ends or did you design it that way.
    The former. I've had an 8ft piece of 0.120" wall in the rafters for many years and the 0.065" was left over from something else. I had to buy 10ft (0.095") to finish the project but everything else was recycled.

  13. #33
    Join Date
    Nov 2012
    Location
    Whine Country, California
    Posts
    442

    Default

    It looks good finished and in use. If you bent up a 180 and then bent (or cut and welded) the 180 so it was "standing up" like an arch, you could just extend the top shelf out with that new u-bend to make a handle. If you installed a piece of sheet (aluminum if you have leftovers) onto the top shelf, you could rest your torch on the top of the shelf between your new handle and the front of the welder. I personally don't like the idea of the torch hanging loosely on the side of the cart. Too many things that it could get hooked on or smashed against (at least where I weld there is).
    Andy
    New Everlast PowerTig 250EX that is begging for me to come up with a few welding projects so it can stretch it's legs. Did someone say aluminum???

    MISC. TOOLS:
    Atlas 618 lathe
    Milwaukee Porta Band with custom made stand
    Dewalt 4-1/2" angle grinder
    Dewalt 14" chop saw

    Strong Hand Nomad portable table
    Juki sewing machine I've had for years (yes I know sewing is for girls)

  14. Default

    Quote Originally Posted by youngnstudly View Post
    It looks good finished and in use. If you bent up a 180 and then bent (or cut and welded) the 180 so it was "standing up" like an arch, you could just extend the top shelf out with that new u-bend to make a handle. If you installed a piece of sheet (aluminum if you have leftovers) onto the top shelf, you could rest your torch on the top of the shelf between your new handle and the front of the welder. I personally don't like the idea of the torch hanging loosely on the side of the cart. Too many things that it could get hooked on or smashed against (at least where I weld there is).
    The torch does need to be fixed someplace or I'm sure I'll be smashing many cups on the floor. I'm not sure if I picture what you describe correctly, but I like the idea of a "basket handle" loop extending forward and up. I may do this and add a torch holder.

  15. #35
    Join Date
    Nov 2012
    Location
    Whine Country, California
    Posts
    442

    Default

    Quote Originally Posted by its_34 View Post
    The torch does need to be fixed someplace or I'm sure I'll be smashing many cups on the floor. I'm not sure if I picture what you describe correctly, but I like the idea of a "basket handle" loop extending forward and up. I may do this and add a torch holder.
    That's exactly what will happen too, smashed cups every time you turn around...Well, maybe not, but it will wreck the ceramic cup when you least expect it to! I'm still mad that I let my tig torch slip off the table, resulting in a broken back cap (a pain to remove the threaded portion)! I'm still running the flush back cap now because of that minor setback. Your description sounds like what I had going in my head when I typed that. I was looking at the "hoop" on a pressure washer frame that was sitting next to me.

    The front "bumper" on this pressure washer cart is what I was thinking. Actually, either end represents what I was thinking. Obviously you could extend it out as far as you needed, and change the angle of the handle portion to more or less of the angle you like:

    Andy
    New Everlast PowerTig 250EX that is begging for me to come up with a few welding projects so it can stretch it's legs. Did someone say aluminum???

    MISC. TOOLS:
    Atlas 618 lathe
    Milwaukee Porta Band with custom made stand
    Dewalt 4-1/2" angle grinder
    Dewalt 14" chop saw

    Strong Hand Nomad portable table
    Juki sewing machine I've had for years (yes I know sewing is for girls)

  16. Default

    Yep, that's the image I had in my head. I'll try that with some smaller diameter bar and add a short piece of tube to hold the torch. I think I've taken the 1.5" tubing too far already with this thing.

  17. #37
    Join Date
    Oct 2012
    Location
    Canada, Suttonwest, Ontario
    Posts
    676

    Default

    Quote Originally Posted by its_34 View Post
    Yep, that's the image I had in my head. I'll try that with some smaller diameter bar and add a short piece of tube to hold the torch. I think I've taken the 1.5" tubing too far already with this thing.
    I made this to hold my torches one mount to the cart and one on a magnet mount to use on the bench or were I am welding.
    Click image for larger version. 

Name:	holder and magnet.jpg 
Views:	380 
Size:	138.4 KB 
ID:	10784Click image for larger version. 

Name:	holder.jpg 
Views:	382 
Size:	137.4 KB 
ID:	10785
    Everlast PowerTig 325EXT (Canada)
    Everlast Power I Mig 250 (Canada)
    Everlast PowerPlasma 80S (Canada)
    Everlast PowerCool W300 (Canada)
    Everlast PowerMTS 250S Fitted with a 30A Spoolgun(Canada)
    Miller Dynasty 400 wireless(Canada)
    Millermatic 252 plus 30A Spoolgun(Canada)

  18. #38

    Default

    Quote Originally Posted by its_34 View Post
    Thanks. I'm using a hole saw notcher. It's one of the cheap ones (no ball bearings, stamped steel guides) but it works for light use. It took quite a bit of shimming to get it to cut on center.

    Attachment 10717

    I made some more progress today and will post some more pics later.
    I have the harbor freight notcher and I have been happy with it. I do use good hole saws which I'm sure helps. I do plan to add some shims to mine.
    Lincoln Eagle Engine Drive
    Everlast MTS 250
    Everlast Power Tig 225lx
    HTP Mig 2400
    Everlast Power Plasma 60C --> Just need to finish my CNC Plasma Table!
    Miller Spectrum 375 Extreme Plasma cutter
    Victor cutting torch
    HF 20 Ton Shop Press
    HF 4x6 Band Saw
    HF Air Compressor
    Northern Tool Drill Press


    www.murphywelding.com

  19. Default

    Quote Originally Posted by Kempy View Post
    I made this to hold my torches one mount to the cart and one on a magnet mount to use on the bench or were I am welding.
    Click image for larger version. 

Name:	holder and magnet.jpg 
Views:	380 
Size:	138.4 KB 
ID:	10784Click image for larger version. 

Name:	holder.jpg 
Views:	382 
Size:	137.4 KB 
ID:	10785
    That is brilliantly simple, thanks for posting. I think I'll cut something similar out of aluminum sheet and weld it to the shelf on the torch-side of the unit.

  20. #40
    Join Date
    May 2012
    Location
    Disneyland
    Posts
    2,662

    Default

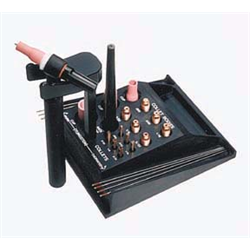
    I've use one of these for years. It's also magnetic, but might be a bit large to stick on the top of smaller welders.


    I think I'll have to make a couple of Kempy's style.

    Another thing I want to try is chop saw notching. There is a good thread about it HERE along with an online calculator to figure out the angles.
    Long arc, short arc, heliarc and in-the-dark!

Similar Threads

  1. KTM SMR Build.
    By 225 in forum Truck, Car and Bike builds
    Replies: 11
    Last Post: 12-06-2012, 08:02 PM
  2. Welding Cart - Power Cart 250 - opinions?
    By ScottRussell in forum Multi-Process Units (TIG,Stick,Plasma/MIG,TIG,Stick Combo units)
    Replies: 3
    Last Post: 12-05-2012, 02:19 PM
  3. Replies: 15
    Last Post: 08-02-2012, 02:30 PM
  4. Tigging and my build
    By Mad-Dax in forum On Road Fabrication
    Replies: 5
    Last Post: 04-13-2012, 05:27 PM
  5. 2nd BMX Build
    By Stelfabulous in forum Off Road Fabrication
    Replies: 11
    Last Post: 10-10-2011, 02:31 AM

Posting Permissions

  • You may not post new threads
  • You may not post replies
  • You may not post attachments
  • You may not edit your posts
  •