Share
Results 1 to 17 of 17

Thread: Rear Bumper

  1. #1

    Default Rear Bumper

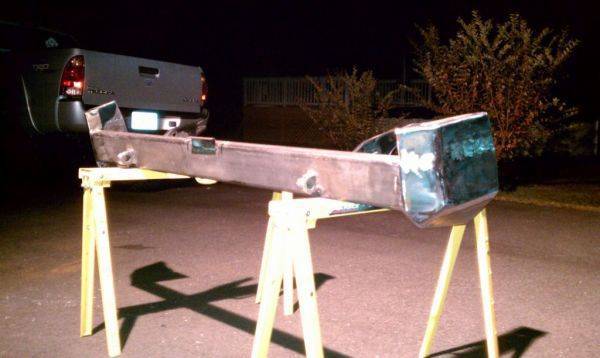
    Hey guys! This was my 1st big project with my new PP205. Much more than I could have tackled with my old hacksaw, grinder, and un-named mig welder. Now only if I had a place to keep my stuff all over at, my old man didnt like his garage cluttered with tools and scraps everywhere Had a few guys waving money ask me to build them one!


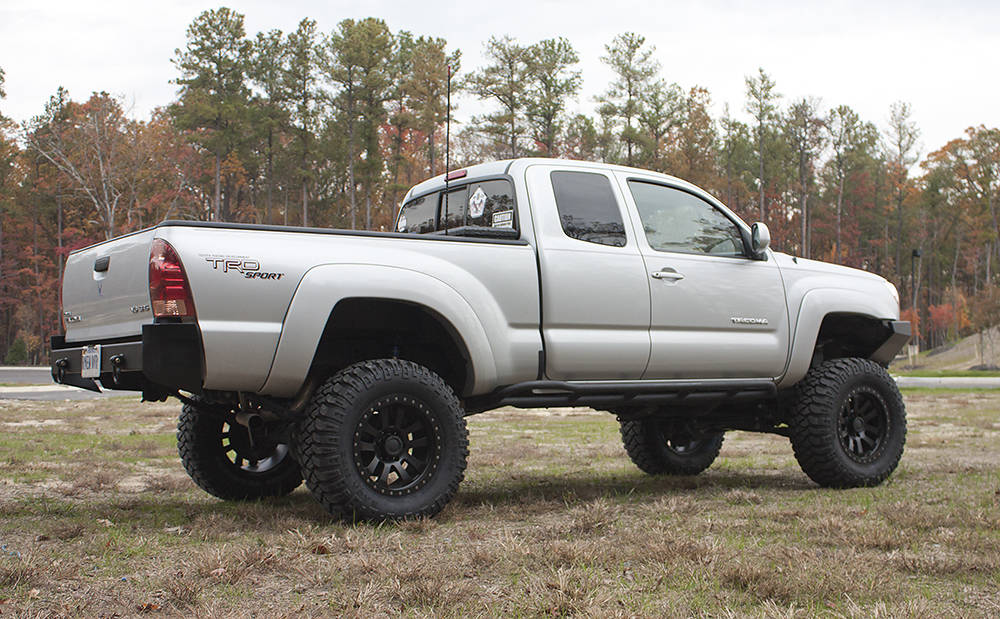
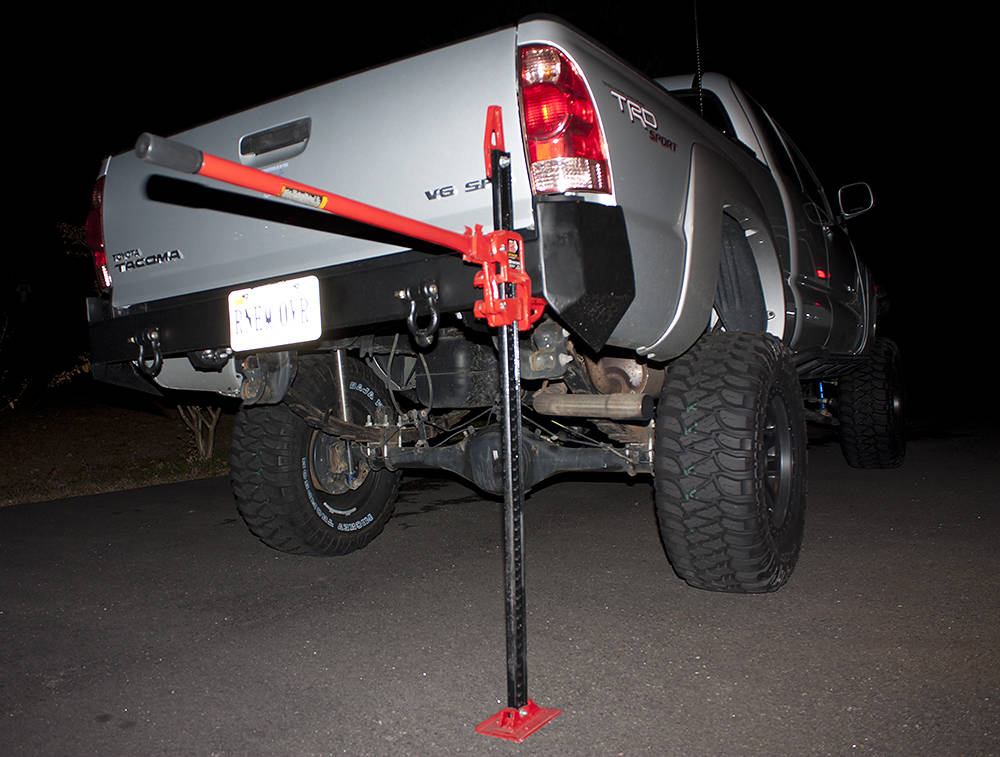
    3/16 steel for the bumper and sides, shackle mounts are 1/2 plate, outside is doubled up for the shackle only.


  2. #2

    Default

    Nice job Krookz,
    Looks nice and strong!

  3. #3

    Default

    Very nice. Gonna add a tow package? It is always nice to see a project in the raw, then done and fitted.
    Mike R.
    Email: admineverlast@everlastwelders.com
    www.everlastgenerators.com
    www.everlastwelders.com
    877-755-9353 x203
    M-F 12 - 7PM PST
    FYI: PP50, PP80, IMIG-200, IMIG-250P, 210EXT and 255EXT.

  4. #4

    Default

    Quote Originally Posted by everlastsupport View Post
    Very nice. Gonna add a tow package? It is always not to see a project in the raw, then done and fitted.
    I have plans to add a hitch behind the license plate at some point, I have no need for it right now though. Here's the only other pics I have during the build...


    Last edited by Krookz; 03-02-2011 at 11:43 PM.

  5. #5

    Default

    Nice bumper. Its simple but gets the job done, the fit up is excellent as well. Did you build the front as well?
    Build it, wheel it, break it, fix it, and repeat!!!!!!!

    Tools:
    Everlast SuperCut 50 Plasma
    Century 200 Mig welder
    JD2 Model 32 Tube Bender

    Toys:
    1995 Ranger 2wd regular cab - 5.0HO Conversion - Street Machine
    1993 Ranger SuperCab - 466 BBF - Extreme offroad
    1985 F250 Regular Cab 4x4 - 460 BBF - Towing Beast

  6. #6

    Default

    Quote Originally Posted by deranged View Post
    Nice bumper. Its simple but gets the job done, the fit up is excellent as well. Did you build the front as well?
    No I did not. I had purchased that a long time ago when I was still using my hack saw and un-named mig.
    ˙˙˙ʎɐqǝ ɯoɹɟ pɹɐoqʎǝʞ dɐǝɥɔ pǝuɯɐp
    PP205 owner
    http://www.sgmedia.net

  7. Default

    You need to build a big ol' base for that hilift jack now. Mine is an aluminum plate that mounts to the center of the spare tire. I hate hilifts, but of course I carry one. Also, I put hitch receivers on the front and back so I can use a 18" extension of hitch stock. It allows me to keep the hilift away from the body.

    Just a suggestion, it would be a shame for that hilift to take out your tail-gate.
    I am out trying to 'find myself'. If I should wander back while I am gone, please tell me to sit quietly and wait for myself to return.

    LOTS of scuba and vintage scuba equipment [I'm Always willing to trade or buy the stuff you think is too old to use]
    Smithy XLT Mill/lathe [It was easier to learn than I thought, I'm no pro, but I can make a bearing hanger]
    Everlast PP256

  8. #8

    Default

    Quote Originally Posted by ducksface View Post
    You need to build a big ol' base for that hilift jack now. Mine is an aluminum plate that mounts to the center of the spare tire. I hate hilifts, but of course I carry one. Also, I put hitch receivers on the front and back so I can use a 18" extension of hitch stock. It allows me to keep the hilift away from the body.

    Just a suggestion, it would be a shame for that hilift to take out your tail-gate.
    Thanks man, I do have a base already. Its abs plastic and lives in my toolbox. Good idea on the hitch stock, I may have to look into somthing that...
    ˙˙˙ʎɐqǝ ɯoɹɟ pɹɐoqʎǝʞ dɐǝɥɔ pǝuɯɐp
    PP205 owner
    http://www.sgmedia.net

  9. #9

    Default

    That looks pretty good. I take it you made it flow with the same lines as the front bumper?
    Jason
    Everlast 255EXT - Perfection
    Everlast PowerPro 256 - UPS Demolished
    Everlast MTS200s
    12 Ton Shop Press
    DeWalt Hand Tools/ChopSaw

  10. #10

    Default

    Quote Originally Posted by Jason View Post
    That looks pretty good. I take it you made it flow with the same lines as the front bumper?
    Yep, that was the idea!
    ˙˙˙ʎɐqǝ ɯoɹɟ pɹɐoqʎǝʞ dɐǝɥɔ pǝuɯɐp
    PP205 owner
    http://www.sgmedia.net

  11. #11

    Default

    Very slick work dude. You ought to consider making them for others (like me!)

    A
    PowerTig 225LX
    PowerCool W300
    PowerPlasma 60S
    Miller 140 MIG

  12. #12

    Default

    looks great man, cant wait to get my PP205 in!
    300whp FWD 94 Celica
    PowerPro 205 with a hack behind the mask!

  13. #13

    Default

    slick work!

    I have problems with my high lift slipping side to side... was thinking about building some kind of "pocket" the jack could fit into when I use it... just a thought.

    Looks great man.
    I'd like to think I'm the guy they are talkin about when they say, "he could F%^& up a cannon ball in a plowed field."
    .................. /...\
    ..............-...|.....|
    ...*.......-'. \..\__/
    ....\.-'.........\
    ... /......... _/
    ...|......... /"
    ...|.... /_\'
    ....\....\_/
    ......""""

  14. #14

    Default

    Quote Originally Posted by ScratchStart View Post
    slick work!

    I have problems with my high lift slipping side to side... was thinking about building some kind of "pocket" the jack could fit into when I use it... just a thought.

    Looks great man.
    Yea I agree. Had thought about getting some 2x2 tube or so... then slice it long ways. Notching the bumper and welding the halfs in the notches.
    ˙˙˙ʎɐqǝ ɯoɹɟ pɹɐoqʎǝʞ dɐǝɥɔ pǝuɯɐp
    PP205 owner
    http://www.sgmedia.net

  15. #15

    Default

    A friend of mine does the rock crawl jeep trail thing and he has after market bumper that are pretty rugged like yours and he had the same problem. Drilled 3/4 holes on the underside of each corner of the front and rear bumpers and we fabricated a bracket that slips over the contact point of the jack with a 1" h x 5/8" d pin welded to it and is held in place with a detent ring pin with a lanyard like this kinda ( http://www.pivotpins.com/catalog/Detring.shtml ) through the hole in the jack. The pin is tall enough that it will handle quite a bit of angle and definitely wont slip. and if you need to use the jack without it just pull the pin slide off the bracket and you have stock jack surface.

    here's a crude 30 sec drawing that I hope illustrates what I am talking about

    Click image for larger version. 

Name:	jackbracket.jpg 
Views:	487 
Size:	32.4 KB 
ID:	1225
    Don

    MTS 200 workhorse
    PowerTig 250EX <---sweet
    80 amp HF inverter arc welder
    Lincoln Buzzbox
    Rotobrute AC-35 Mag Drill
    Milwaukee mag drill
    HF Heavy Duty 16 Speed Bench Drill Press (Custom made Adjustable Height stand)

    I gotta find more junk to sell on EBaY ... Must Buy a Plasma Cutter and a Mig Welder


    Fullerton, Ca
    USA

  16. #16

    Default

    Quote Originally Posted by aaxiss View Post
    A friend of mine does the rock crawl jeep trail thing and he has after market bumper that are pretty rugged like yours and he had the same problem. Drilled 3/4 holes on the underside of each corner of the front and rear bumpers and we fabricated a bracket that slips over the contact point of the jack with a 1" h x 5/8" d pin welded to it and is held in place with a detent ring pin with a lanyard like this kinda ( http://www.pivotpins.com/catalog/Detring.shtml ) through the hole in the jack. The pin is tall enough that it will handle quite a bit of angle and definitely wont slip. and if you need to use the jack without it just pull the pin slide off the bracket and you have stock jack surface.

    here's a crude 30 sec drawing that I hope illustrates what I am talking about

    Click image for larger version. 

Name:	jackbracket.jpg 
Views:	487 
Size:	32.4 KB 
ID:	1225
    That's clever! That almost reminds me of the shackle adapter that some company makes. Hmmm
    ˙˙˙ʎɐqǝ ɯoɹɟ pɹɐoqʎǝʞ dɐǝɥɔ pǝuɯɐp
    PP205 owner
    http://www.sgmedia.net

  17. Default

    I have built in hitch receivers in mine so I can use a hylift jack [or change snatch equipment from hooks to rings if needing a sideways winch pull] and keep that monster away from my body. A receiver on each side, a 2 foot extension of stock to slip in it, and I can use the hylift without it gouging my body. Where you have your snatch rings is the place to put them, and you can put your snatch rings in the receivers. I have them front and back and as soon as the plasma cutter gets here I'll have a 'slide-on' receiver that slips over my sliders so I can use the hilift from the side.

    Stupid hilifts. I'm about to stop using it as a jack. I have put in the receivers built base plates, have adapters of all sorts, and the damn thing will tip over if it gets the slightest chance. I am investigating BIG scissor jacks like they use on motors homes....

    The 2 foot extension is the key. If the damn jack tips it'll miss the truck. You can pin the jack in to that extension [hitch stock] just as well as you can the bumper.
    Last edited by ducksface; 03-18-2011 at 09:47 PM.
    I am out trying to 'find myself'. If I should wander back while I am gone, please tell me to sit quietly and wait for myself to return.

    LOTS of scuba and vintage scuba equipment [I'm Always willing to trade or buy the stuff you think is too old to use]
    Smithy XLT Mill/lathe [It was easier to learn than I thought, I'm no pro, but I can make a bearing hanger]
    Everlast PP256

Similar Threads

  1. 970 Crawler Rear Diff
    By GFab70 in forum Off Road Fabrication
    Replies: 2
    Last Post: 12-04-2015, 11:49 PM
  2. Bumper build questions
    By Vanman in forum General Welder Questions
    Replies: 6
    Last Post: 08-07-2014, 12:09 AM
  3. Mean Green Contest - Project 1 - Jeep Bumper Support
    By SeanMurphy265 in forum On Road Fabrication
    Replies: 0
    Last Post: 03-19-2012, 09:10 PM
  4. New winch bumper for the old truck
    By Titan winch in forum Off Road Fabrication
    Replies: 8
    Last Post: 06-24-2011, 06:05 PM

Posting Permissions

  • You may not post new threads
  • You may not post replies
  • You may not post attachments
  • You may not edit your posts
  •